Difference between revisions of "Vendor Module"
| (6 intermediate revisions by 2 users not shown) | |||
| Line 4: | Line 4: | ||
There is no need of installing this module, as it is already included within Tactic services. | There is no need of installing this module, as it is already included within Tactic services. | ||
= Setup = | = Setup = | ||
For using this module the users need to enable it by using an administrator account. The menu options for activating this module are: '''Home –> Setup – > Module'''. The users then need to click on '''Activate'''. The modules will be activated after completing this step. The settings icon {{#fas:cog}} will be visible at the end of the module box, the users can click in that to access setup. | For using this module the users need to enable it by using an administrator account. The menu options for activating this module are: '''Home –> Setup – > Module'''. The users then need to click on '''Activate'''. The modules will be activated after completing this step. The settings icon {{#fas:cog}} will be visible at the end of the module box, the users can click in that to access further setup for this module to access the functionalities in a better way. | ||
= Creation of a new vendor = | = Creation of a new vendor = | ||
| Line 11: | Line 11: | ||
[[File:Vendor_1.PNG|center]] | [[File:Vendor_1.PNG|center|link=]] | ||
= Modification of a vendor = | = Modification of a vendor = | ||
The user need to click '''Modify''' and type all the changes and at last press '''Save'''. | The user need to click '''Modify''' and type all the changes and at last press '''Save'''. | ||
[[File:Vendor_2.PNG|center|link=]] | |||
= Deleting a vendor = | = Deleting a vendor = | ||
Clicking on the '''Delete''' option is enough to delete the customer/ vendor/ prospect. However, a customer/ vendor/ prospect cannot be deleted if it has documents linked with it. | Clicking on the '''Delete''' option is enough to delete the customer/ vendor/ prospect. However, a customer/ vendor/ prospect cannot be deleted if it has documents linked with it. | ||
[[File:Vendor_3.PNG|center|link=]] | |||
= Creating a contact for a vendor = | = Creating a contact for a vendor = | ||
Contacts hold a very important place in the creation and management of vendors. The vendors can be associated with big companies and corporations. Hence, to keep a better connection with the vendors the users need to keep the contact information of one or two specific persons to contact the third party in the time of necessity without having to face much issues. For creating a contact the users need to visit the option of '''new contact'''. All the important criterion need to be filled effectively fir creating a new contact. The users need to choose the vendor, for whom they are creating a contact as well. | Contacts hold a very important place in the creation and management of vendors. The vendors can be associated with big companies and corporations. Hence, to keep a better connection with the vendors the users need to keep the contact information of one or two specific persons to contact the third party in the time of necessity without having to face much issues. For creating a contact the users need to visit the option of '''new contact'''. All the important criterion need to be filled effectively fir creating a new contact. The users need to choose the vendor, for whom they are creating a contact as well. With each progress of the of the purchase order an email will be sent to the vendor contact. | ||
If your vendor orders are in the need of a contact, then you can easily add contacts to your supplier orders. These contacts will represent the individuals who are directly handling the orders. For adding contacts to the orders, you need to follow a few steps, which are, | |||
Commerce -> purchase orders -> list -> choose the concerned order -> contacts/addresses tab -> choose your preferred contact by clicking on the drop-down arrow. The contacts for the purchase order or supplier order will be updated easily. | |||
= Modification of a contact = | = Modification of a contact = | ||
A contact can easily be modified without having to go through a complicated process. For modifying a contact the users need to go to the contact card and choose the option of '''modify''' to modify a contact or to update the information or the details. For saving the modification the users need to click on '''save'''. | A contact can easily be modified without having to go through a complicated process. For modifying a contact the users need to go to the contact card and choose the option of '''modify''' to modify a contact or to update the information or the details. For saving the modification the users need to click on '''save'''. | ||
Latest revision as of 08:45, 23 December 2022
Introduction
Vendors are one of the most important factors for any business. They provide the companies with important materials or services to ensure the workflow of the companies do not seizes. Hence, it can be stated that the vendors are an important aspect and they need to be managed efficiently for initiating company growth. With the help of Tactic’s vendor module the users can easily manage their vendors without having to face much difficulties.
Installation
There is no need of installing this module, as it is already included within Tactic services.
Setup
For using this module the users need to enable it by using an administrator account. The menu options for activating this module are: Home –> Setup – > Module. The users then need to click on Activate. The modules will be activated after completing this step. The settings icon will be visible at the end of the module box, the users can click in that to access further setup for this module to access the functionalities in a better way.
Creation of a new vendor
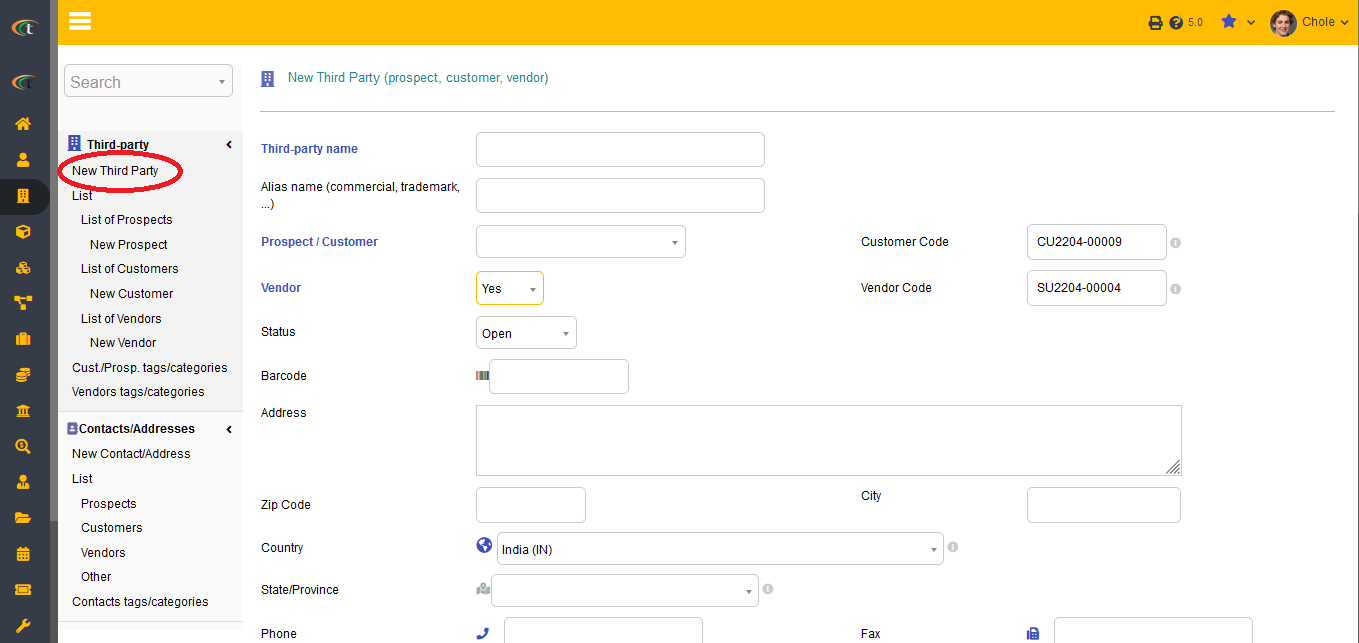
For the creation of a new vendor the users need to click the tab Third parties then under the menus Third party, the option of New vendor need to be chosen. All the fields must me filled for better user experience. After creation of third party the user can add and link files and other important documents within the tab.

Modification of a vendor
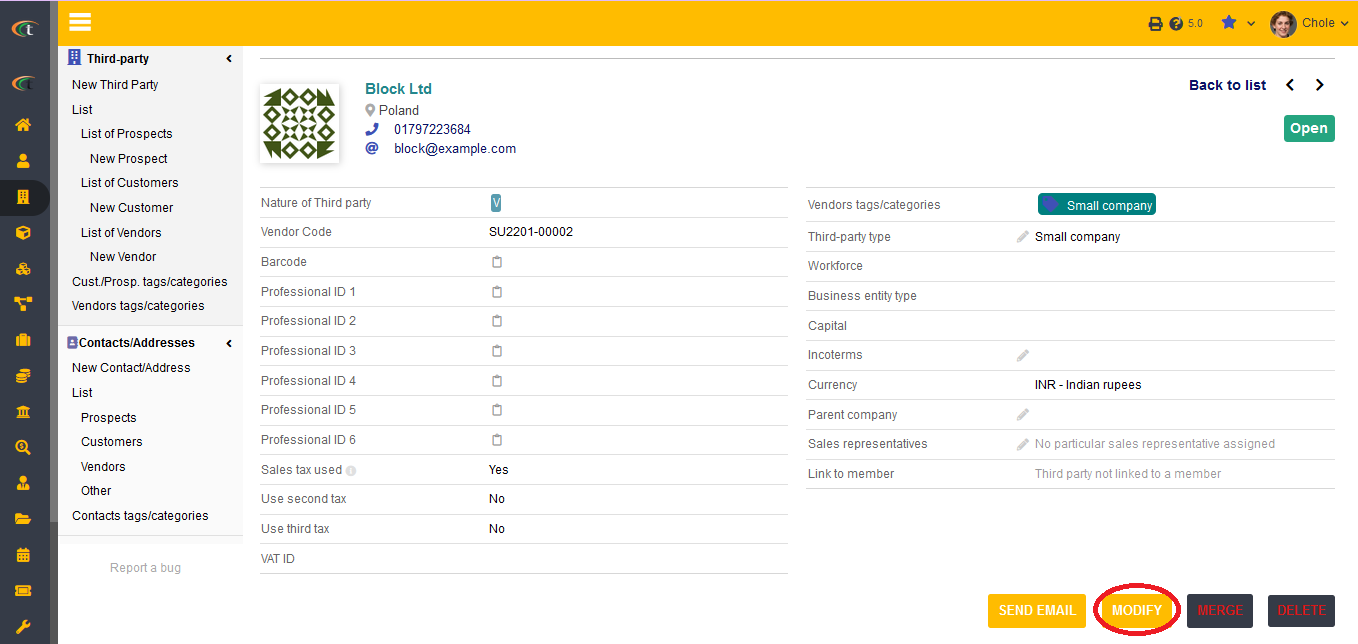
The user need to click Modify and type all the changes and at last press Save.

Deleting a vendor
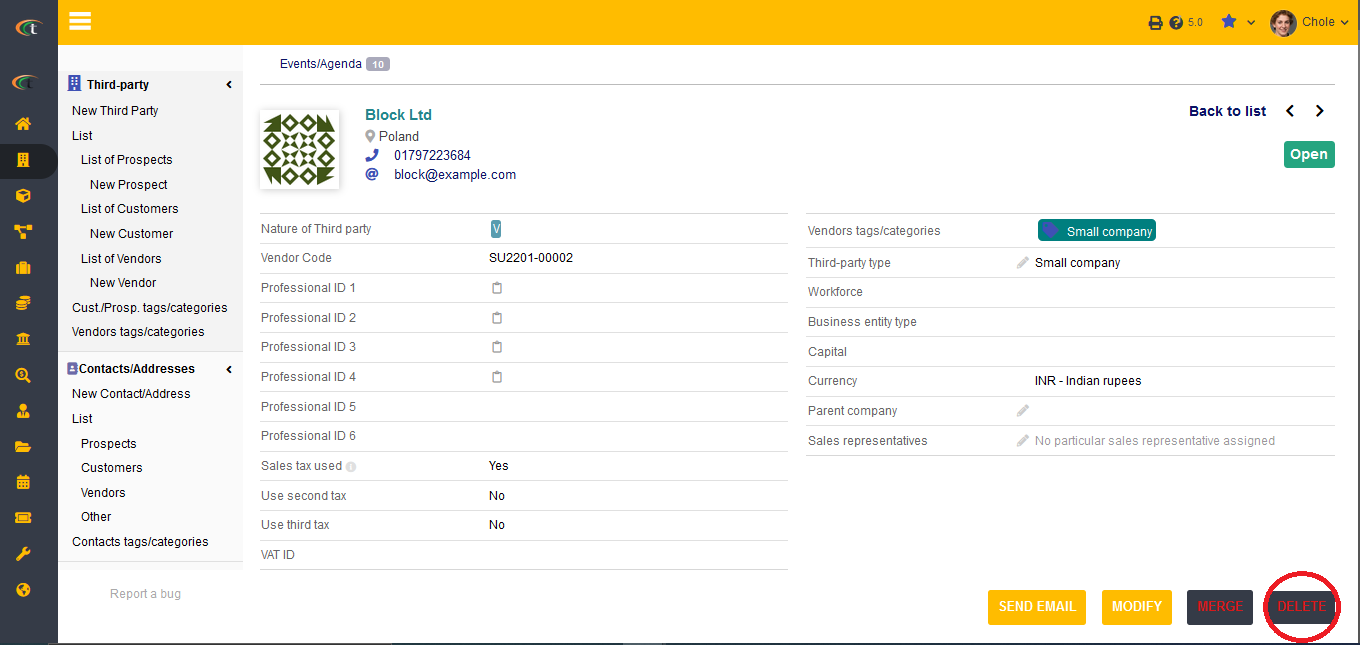
Clicking on the Delete option is enough to delete the customer/ vendor/ prospect. However, a customer/ vendor/ prospect cannot be deleted if it has documents linked with it.

Creating a contact for a vendor
Contacts hold a very important place in the creation and management of vendors. The vendors can be associated with big companies and corporations. Hence, to keep a better connection with the vendors the users need to keep the contact information of one or two specific persons to contact the third party in the time of necessity without having to face much issues. For creating a contact the users need to visit the option of new contact. All the important criterion need to be filled effectively fir creating a new contact. The users need to choose the vendor, for whom they are creating a contact as well. With each progress of the of the purchase order an email will be sent to the vendor contact.
If your vendor orders are in the need of a contact, then you can easily add contacts to your supplier orders. These contacts will represent the individuals who are directly handling the orders. For adding contacts to the orders, you need to follow a few steps, which are, Commerce -> purchase orders -> list -> choose the concerned order -> contacts/addresses tab -> choose your preferred contact by clicking on the drop-down arrow. The contacts for the purchase order or supplier order will be updated easily.
Modification of a contact
A contact can easily be modified without having to go through a complicated process. For modifying a contact the users need to go to the contact card and choose the option of modify to modify a contact or to update the information or the details. For saving the modification the users need to click on save.
Deleting a contact
For deleting a contact the users need to choose the Delete option.
Life cycle of a third party
There are two states that are associated with a third party. Which are active and inactive. The users can choose the statuses of the third parties as per their organisational needs.