Difference between revisions of "Mass Emailing Module"
| (2 intermediate revisions by the same user not shown) | |||
| Line 28: | Line 28: | ||
== Removing a file == | == Removing a file == | ||
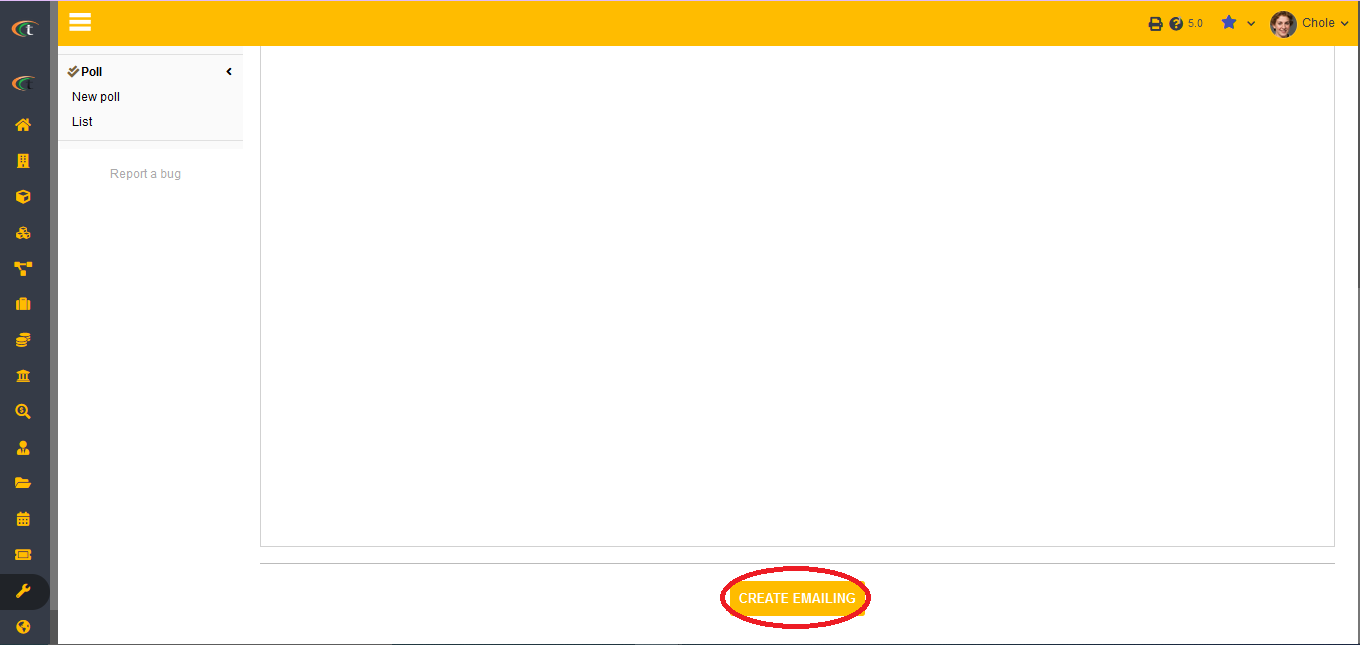
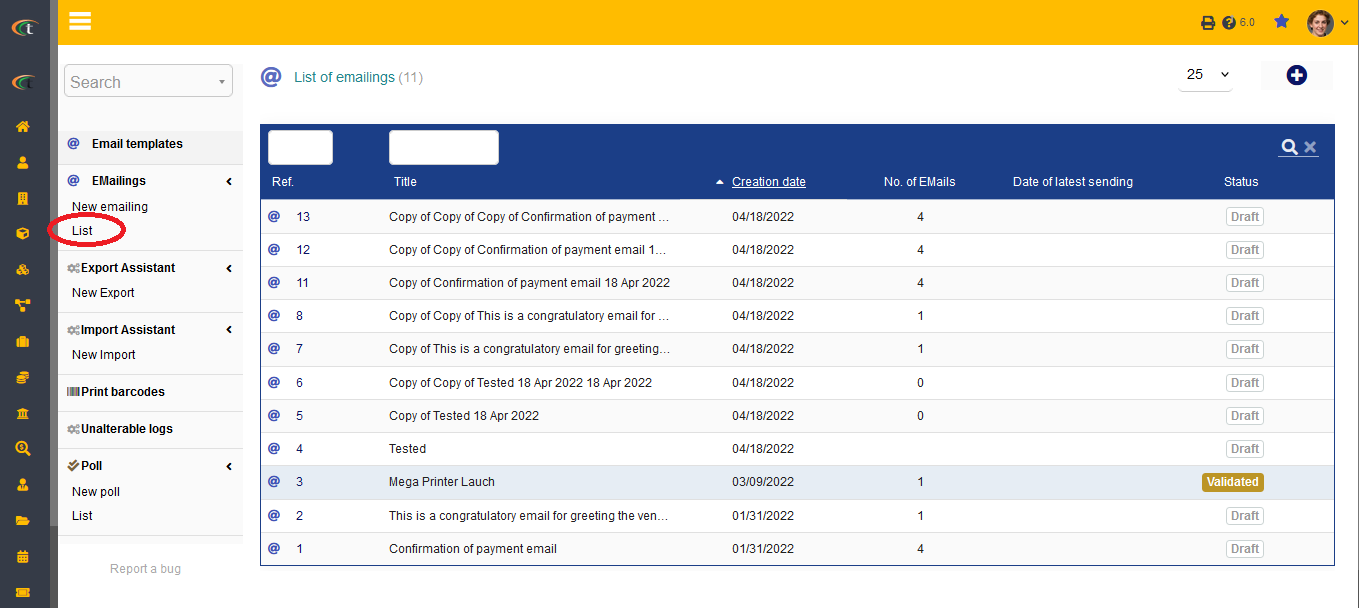
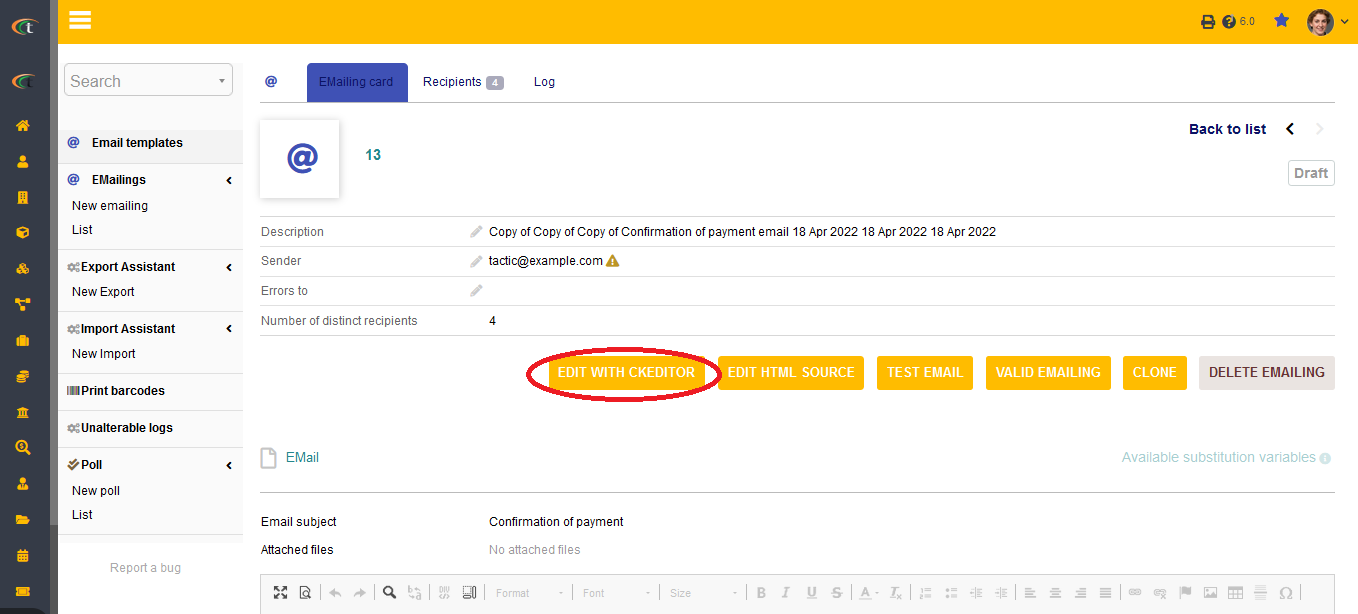
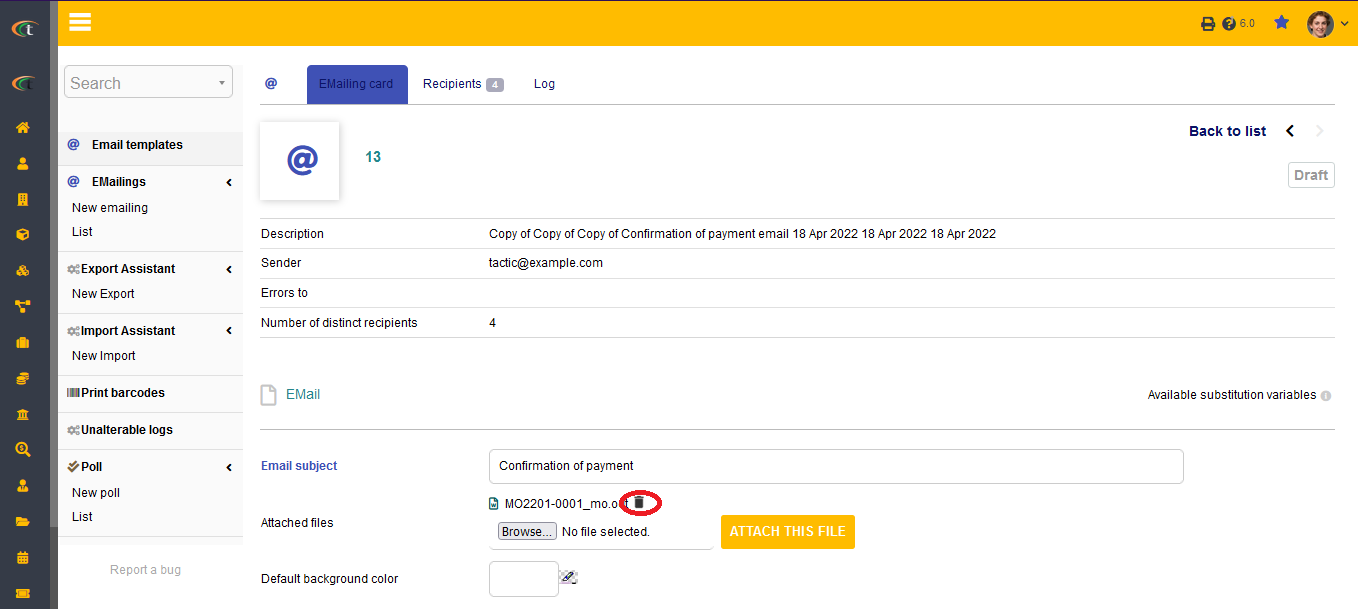
Removing the attached file with email is easy. All that you need to do is to go to tools -> emailing -> list -> choose the concerned emailing -> edit with ckeditor -> attached file -> click on the trash icon -> your attached file will be deleted. | Removing the attached file with email is easy. All that you need to do is to go to tools -> emailing -> list -> choose the concerned emailing -> edit with ckeditor -> attached file -> click on the trash icon -> your attached file will be deleted. | ||
Step 1 | |||
[[File:Removing_file_1.PNG|center|link=]] | |||
Step 2 | |||
[[File:Removing_file_2.PNG|center|link=]] | |||
Step 3 | |||
[[File:Removing_file_3.PNG|center|link=]] | |||
Step 4 | |||
[[File:Removing_file_4.PNG|center|link=]] | |||
== Adding third-parties as an email target == | == Adding third-parties as an email target == | ||
You can always select third-parties into emailing targets. For that you have to go through a small process. tools -> emailing -> list -> choose the concerned emailing -> go to recipient tab -> Third-parties and members -> click the drop-down arrow to choose the type of third-party -> add. The targeted third-party will be added. | You can always select third-parties into emailing targets. For that you have to go through a small process. tools -> emailing -> list -> choose the concerned emailing -> go to recipient tab -> Third-parties and members -> click the drop-down arrow to choose the type of third-party -> add. The targeted third-party will be added. | ||
[[File:Third-party_targets_1.PNG|center|link=]] | |||
[[File:Third-party_targets_2.PNG|center|link=]] | |||
[[File:Third-party_targets_3.PNG|center|link=]] | |||
== Sending emails from third-party card == | == Sending emails from third-party card == | ||
The users can send emails directly from the third-party cards. For sending emails through the third-party cards, you need to first open the third-party card by visiting third-party (from main menu) -> third-party -> list -> choose the concerned third-party -> click on send email -> fill all the important criteria -> send email. The email will be sent to the third-party. | The users can send emails directly from the third-party cards. For sending emails through the third-party cards, you need to first open the third-party card by visiting third-party (from main menu) -> third-party -> list -> choose the concerned third-party -> click on send email -> fill all the important criteria -> send email. The email will be sent to the third-party. | ||
Step 1 | |||
[[File:Email_from_third_party_card_1.PNG|center|link=]] | |||
Step 2 | |||
[[File:Email_from_third_party_card_2.PNG|center|link=]] | |||
= Functionalities of emailing module = | = Functionalities of emailing module = | ||
Latest revision as of 08:56, 27 December 2022
Introduction
A business organisation needs to be connected with its customers, vendors, users and other members for enhancing workflow inside the organisation. Emailing is one of the most preferred method of communication in current civilisation. Moreover, business itself is quite dependent on emails as well, as digital marketers refer emailing as one of the most convenient method of promoting the business. Tactic helps the users in constructing emails directly from the software. This is one of the most important module that has been designed for increasing positive experience of the users. This module helps the users to mass email to the customers, prospects, vendors, members and users.
Installation
There is no need of installing this module, as it is already included within Tactic services.
Setup
For using this module the users need to enable it by using an administrator account. The menu options for activating this module are: Home –> Setup – > Module. The users then need to click on Activate. The modules will be activated after completing this step. The settings icon will be visible at the end of the module box, the users can click in that to access further setup for this module for accessing the functionalities in a better way.
Creation of new email
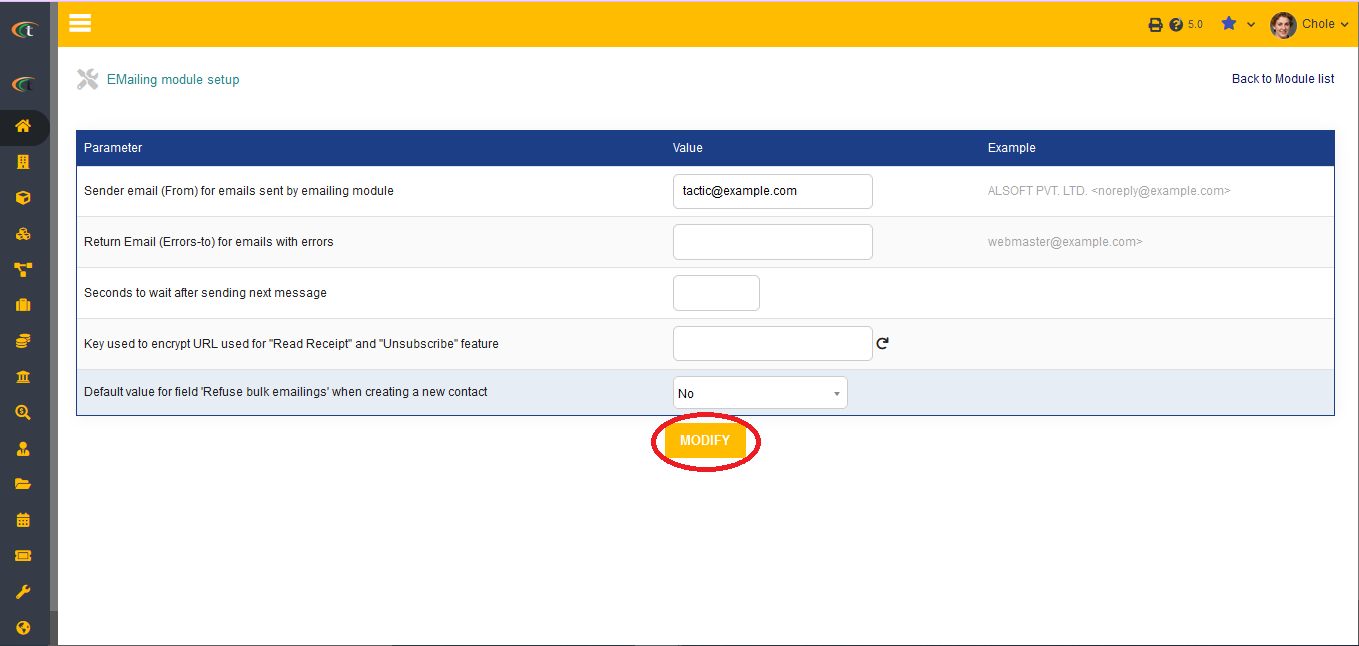
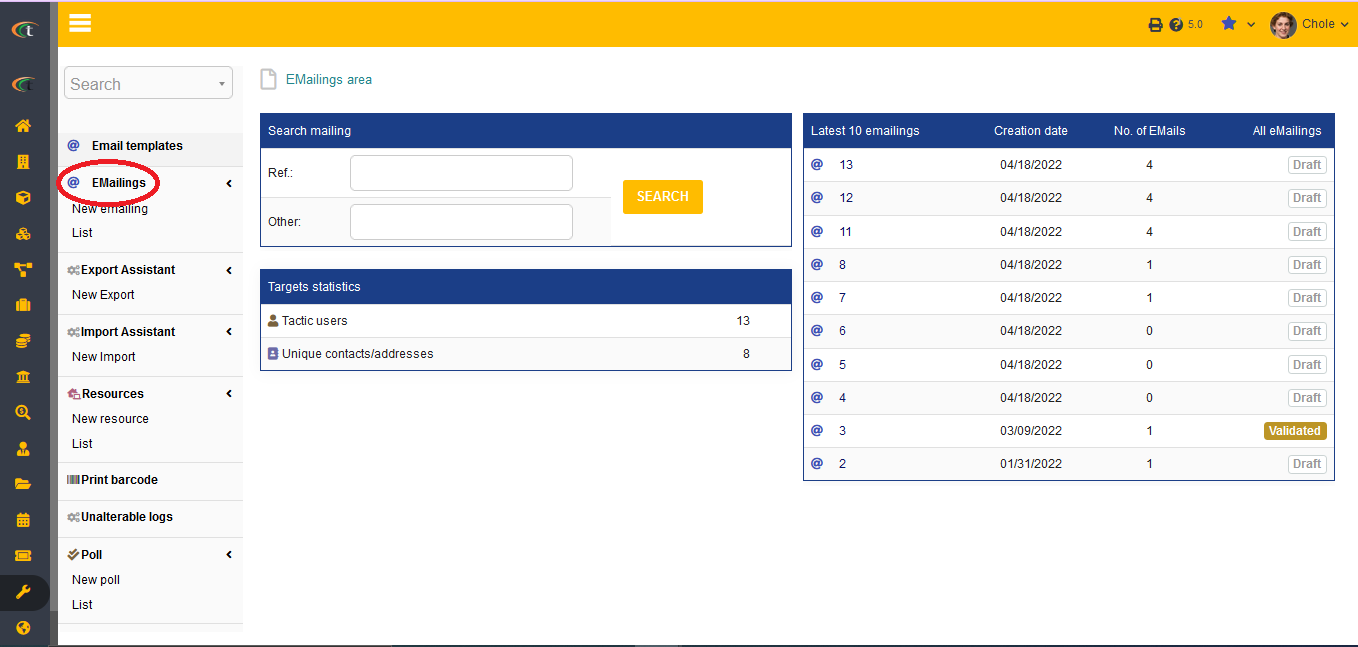
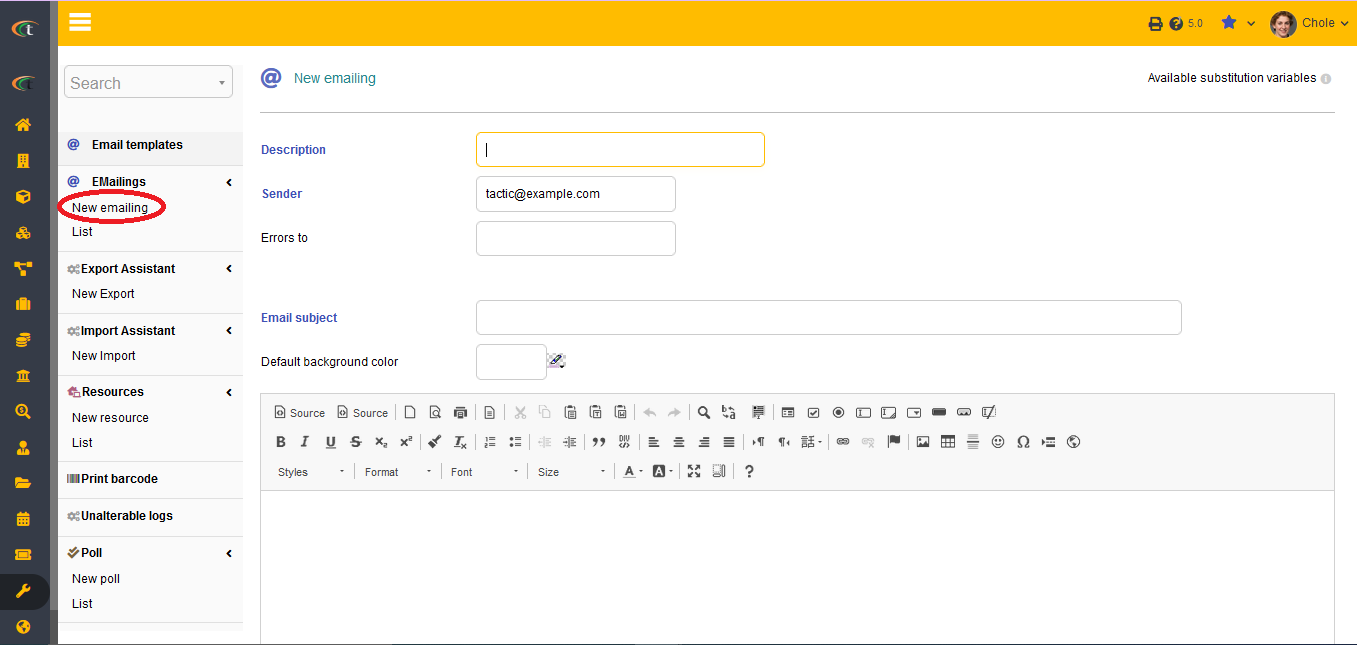
The users need to add the default email at the mass emailing module setup before starting wit the emailing. Creation of a new email can be performed by going to the Tools option from the tabs. The option of New Emailing need to be chosen for drafting a new marketing email. It is mandatory for the users to add a description and a topic. The users can modify their background colors. Moreover, the users will be able to add different sources and selecting existing data.
Adding inline image
The users can use inline images in email now. When you are editing an emailing, you can add the image directly by clicking on the image icon in the toolbar. It will open a window to allow you to add images within the emails very easily. You can browse through the images and add the one you like by clicking on the “upload” option.
Removing a file
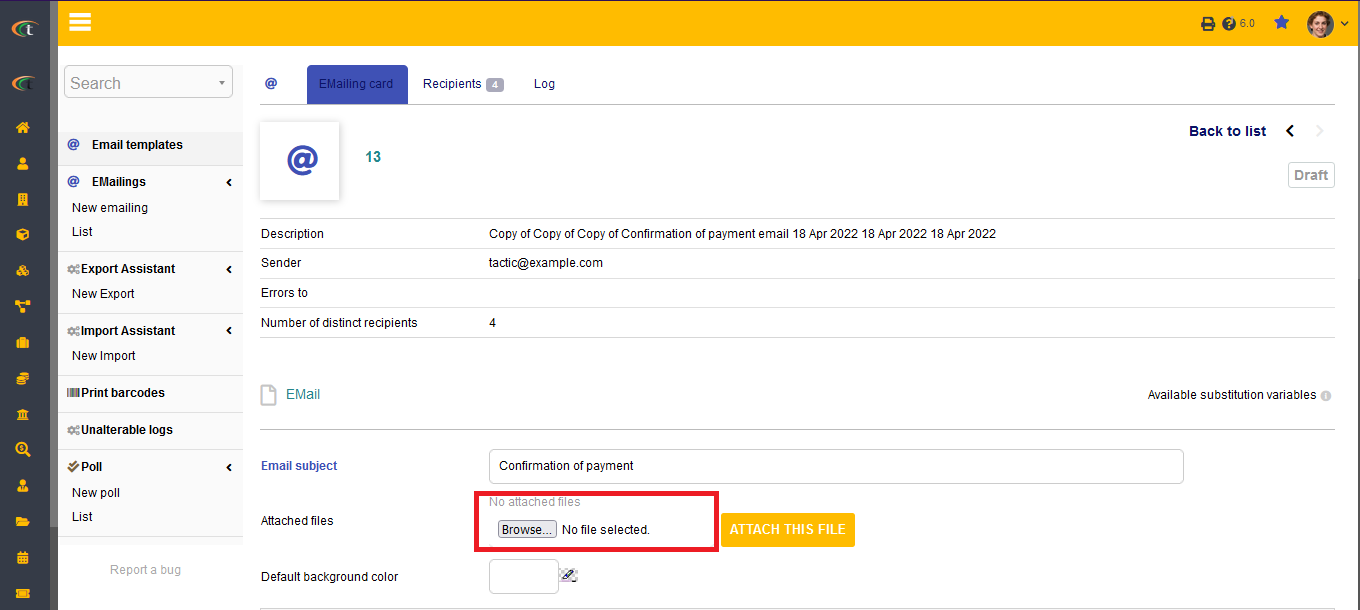
Removing the attached file with email is easy. All that you need to do is to go to tools -> emailing -> list -> choose the concerned emailing -> edit with ckeditor -> attached file -> click on the trash icon -> your attached file will be deleted.
Step 1
Step 2
Step 3
Step 4
Adding third-parties as an email target
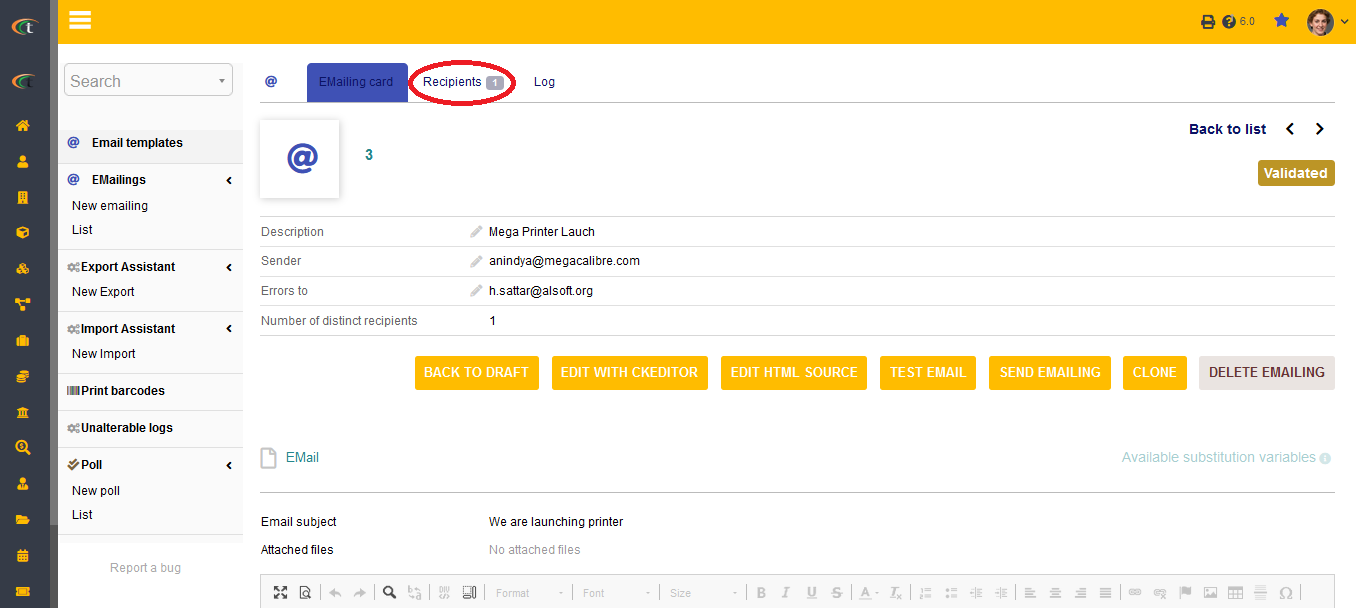
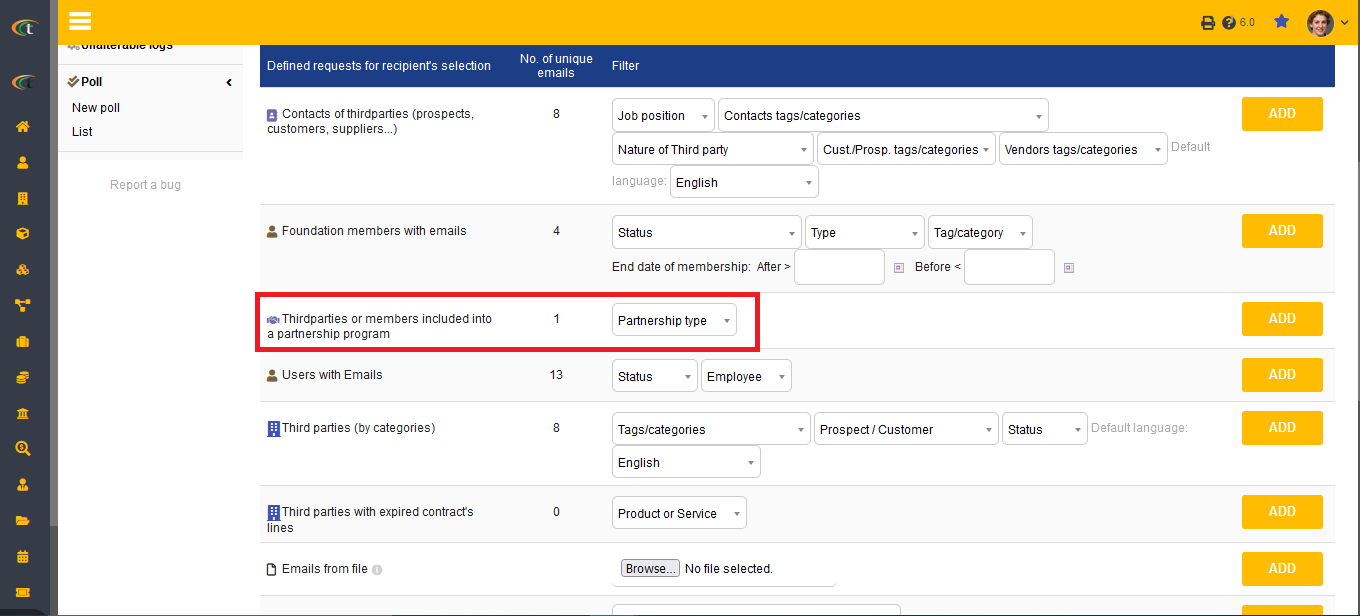
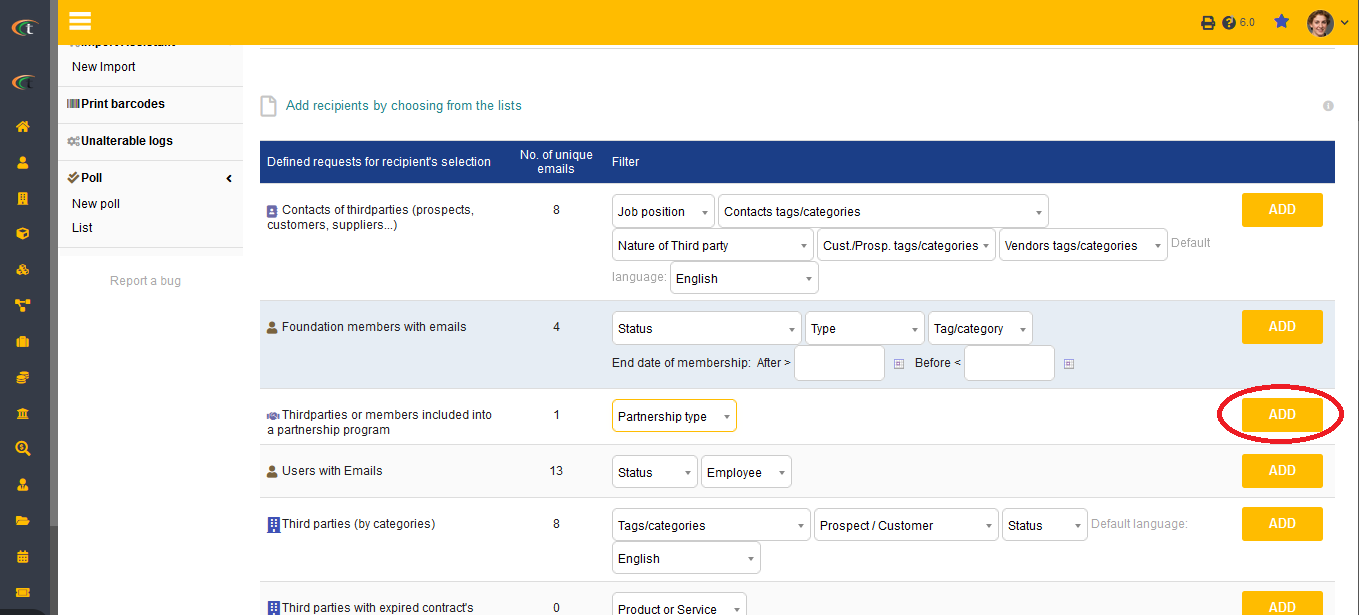
You can always select third-parties into emailing targets. For that you have to go through a small process. tools -> emailing -> list -> choose the concerned emailing -> go to recipient tab -> Third-parties and members -> click the drop-down arrow to choose the type of third-party -> add. The targeted third-party will be added.
Sending emails from third-party card
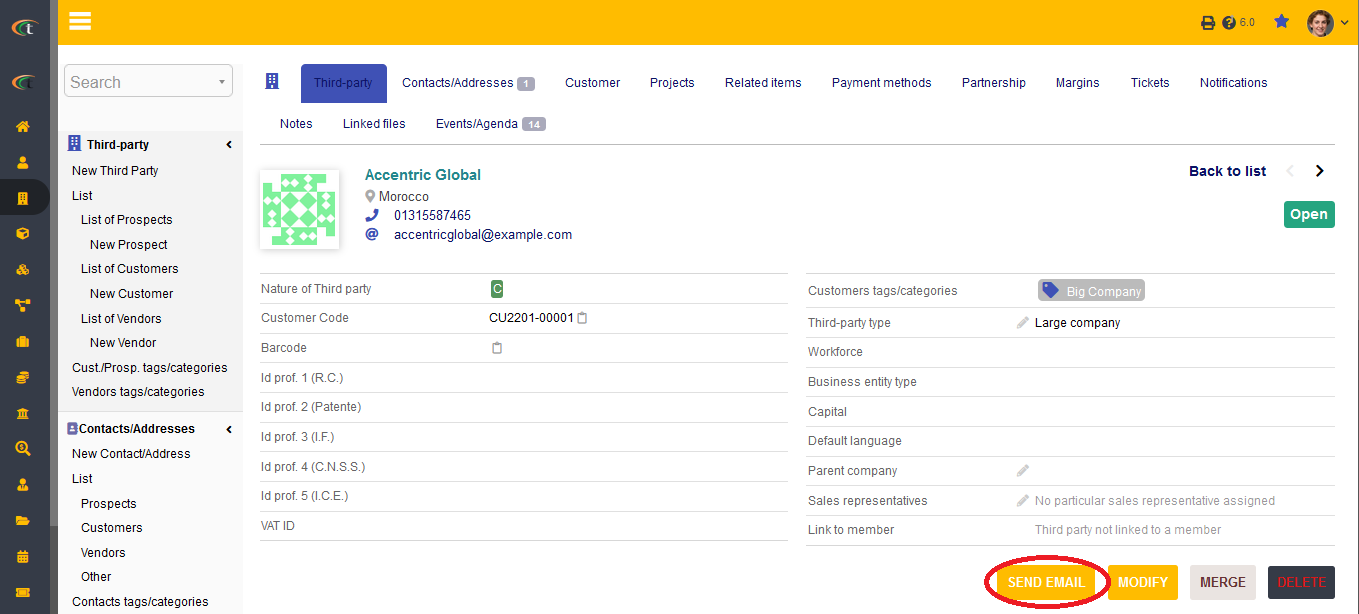
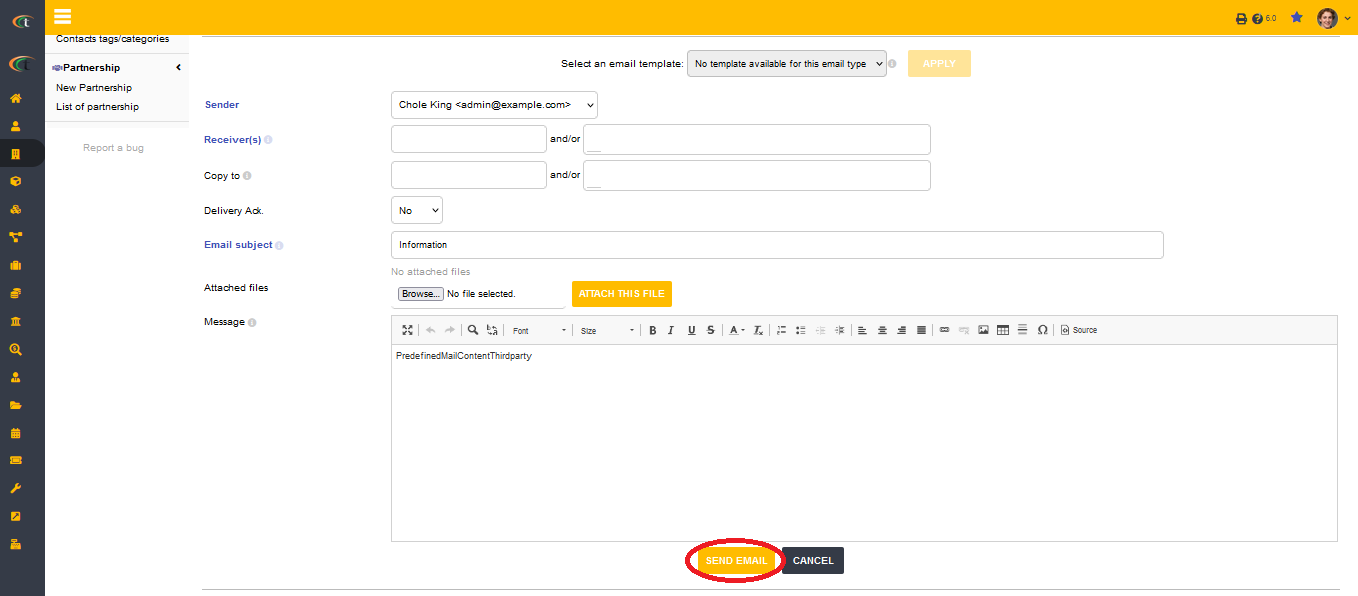
The users can send emails directly from the third-party cards. For sending emails through the third-party cards, you need to first open the third-party card by visiting third-party (from main menu) -> third-party -> list -> choose the concerned third-party -> click on send email -> fill all the important criteria -> send email. The email will be sent to the third-party.
Step 1
Step 2
Functionalities of emailing module
- The users can choose targets from predefined lists
- The users can modify the emails as per their preferences
- Status of emails can be changed into Validated
- The global status of emails helps in updating each of the recipient individually
- You can attach files on emailing campaigns as well. Just click on the option of attach files -> choose the file that you need -> upload.
Life cycle of emailing
The users can choose targets audience of the emails all by themselves. The users will be provided with an option of choosing the targets from the predefined dynamic lists from Tactic data. The users will also be able to choose targets from external files. The lists can be modified as per the business needs. The users can check their own email for test the validation of the email address and if it works out the user can change the status to validated. The users can send mass emails from the command line with a script mailing php. However, only emails with validated emailing status can be sent through this script.
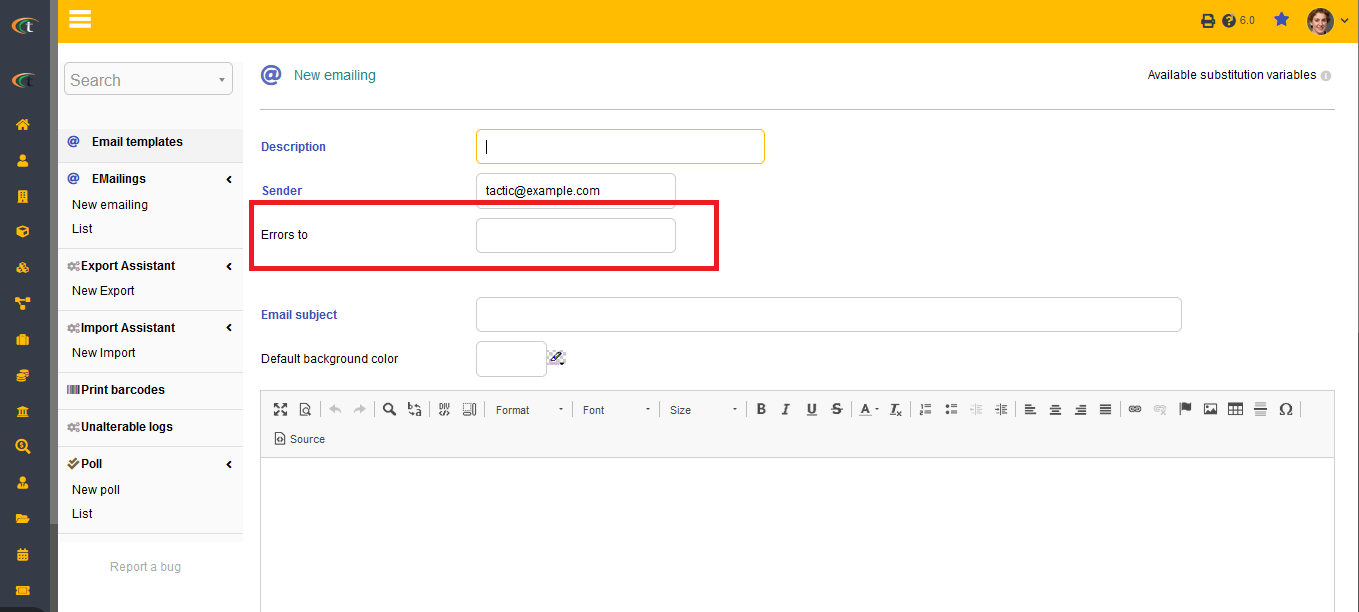
Errors-to
When you are adding a new emailing, you can add any email address in the field of errors-to. This is to increase the convenience of the users. When the email is not sent due to any technical defaults then the email will be delivered to the email ID that is added as an error-to account. Hence, the users can review which mails have failed to reach to their recipients.
