Difference between revisions of "Knowledge management Module"
(→Setup) |
(→Setup) |
||
| (2 intermediate revisions by the same user not shown) | |||
| Line 6: | Line 6: | ||
= Setup = | = Setup = | ||
For using this module the users need to enable it by using an administrator account. The menu options for activating this module are: '''Home –> Setup – > Module'''. The users then need to click on '''Activate'''. The modules will be activated after completing this step. The settings icon {{#fas:cog}} will be visible at the end of the module box, the users can click in that to access further setup for this module to access the functionalities in a better way. | For using this module the users need to enable it by using an administrator account. The menu options for activating this module are: '''Home –> Setup – > Module'''. The users then need to click on '''Activate'''. The modules will be activated after completing this step. The settings icon {{#fas:cog}} will be visible at the end of the module box, the users can click in that to access further setup for this module to access the functionalities in a better way. | ||
= Benefits of Using Knowledge Management Module = | |||
There is no doubt about the importance of the knowledge management module in enhancing the workflow of an organization. There are quite a good number of benefits that can be gained by using this module. Some of these benefits are listed below, | |||
* Knowledge management module provides a better flow of information within the organization. The users (with proper permissions) can access the knowledge management module and solve their queries themselves. | |||
* Using knowledge management module for internal queries can reduce the amount of time needed for research. It also leads towards faster decision making and also cost saving in some special purposes. | |||
* You can integrate knowledge base articles to tickets as well, in the case of both internal tickets and tickets created from the public interface. | |||
= Creating knowledge base articles = | |||
Creating knowledge base articles are very easy, this can be done with just a few steps. | |||
Adding an article in the knowledge management module is quite easy. It is done within just a few clicks here and there. You can easily achieve the same by following the below-discussed steps. These steps are discussed below, | |||
* Step 1: Click on the ticket menu from the main menu bar. The ticket dashboard will open upon clicking it. | |||
* Step 2: Choose the option “New article”, located under knowledge management, from the sub-menu bar. | |||
[[File:Creating-article-1.PNG|center|link=]] | |||
* Step 3: Upon clicking on “New article” option, a new page will open. Here you need to fill up each of the criterion correctly. | |||
[[File:Creating-article-2.PNG|center|link=]] | |||
* Step 4: Click on “create” to complete creating the article. | |||
[[File:Creating-article-3.PNG|center|link=]] | |||
* Step 5: You need to click on “validate” for validating an article, by opening the article from “List of articles” submenu. | |||
[[File:Creating-article-4.PNG|center|link=]] | |||
* Step 6: Click on “modify” to modify an article. | |||
* Step 7: Similarly, clicking on “delete” will delete an article and clicking on “back to draft” will change its status back to draft. | |||
[[File:Creating-article-5.PNG|center|link=]] | |||
You can visit '''[[How_to_create_products_or_services_knowledge_base_in_Tactic|Knowledge Base Tutorials]]''' to learn about the detailed process of creating and using knowledge base articles. | |||
Latest revision as of 10:57, 4 May 2023
Introduction
Knowledge management is a process, by conducting which an organisation shares, analyses, and organises knowledge. The manner of knowledge management is rather easy to help the employees in accessing knowledge seamlessly. Knowledge can include technical resources, skills of employees, FAQs and other important elements. Therefore, it is important for an ERP & CRM software to possess a knowledge management system for the betterment of workflow management. Tactic provides knowledge management system for enhancing user experiences. This module allows the Tactic users to manage their knowledge base effectively and efficiently.
Installation
There is no need of installing this module, as it is already included within Tactic services.
Setup
For using this module the users need to enable it by using an administrator account. The menu options for activating this module are: Home –> Setup – > Module. The users then need to click on Activate. The modules will be activated after completing this step. The settings icon will be visible at the end of the module box, the users can click in that to access further setup for this module to access the functionalities in a better way.
Benefits of Using Knowledge Management Module
There is no doubt about the importance of the knowledge management module in enhancing the workflow of an organization. There are quite a good number of benefits that can be gained by using this module. Some of these benefits are listed below,
- Knowledge management module provides a better flow of information within the organization. The users (with proper permissions) can access the knowledge management module and solve their queries themselves.
- Using knowledge management module for internal queries can reduce the amount of time needed for research. It also leads towards faster decision making and also cost saving in some special purposes.
- You can integrate knowledge base articles to tickets as well, in the case of both internal tickets and tickets created from the public interface.
Creating knowledge base articles
Creating knowledge base articles are very easy, this can be done with just a few steps. Adding an article in the knowledge management module is quite easy. It is done within just a few clicks here and there. You can easily achieve the same by following the below-discussed steps. These steps are discussed below,
- Step 1: Click on the ticket menu from the main menu bar. The ticket dashboard will open upon clicking it.
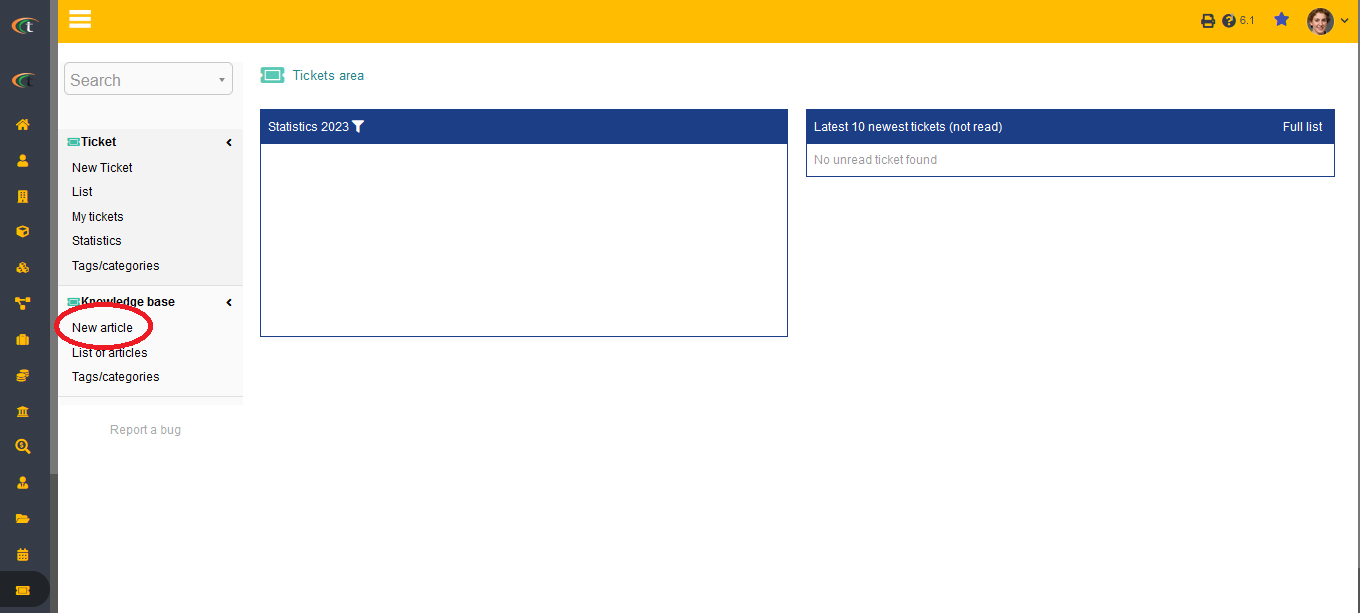
- Step 2: Choose the option “New article”, located under knowledge management, from the sub-menu bar.
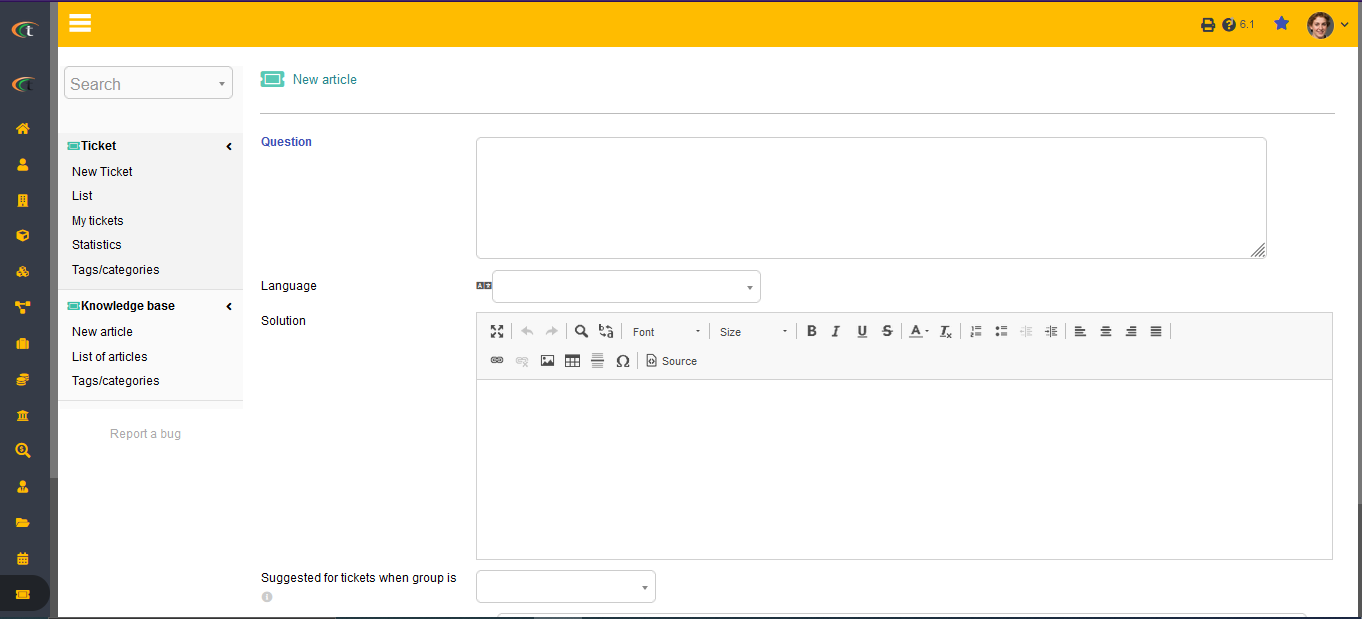
- Step 3: Upon clicking on “New article” option, a new page will open. Here you need to fill up each of the criterion correctly.
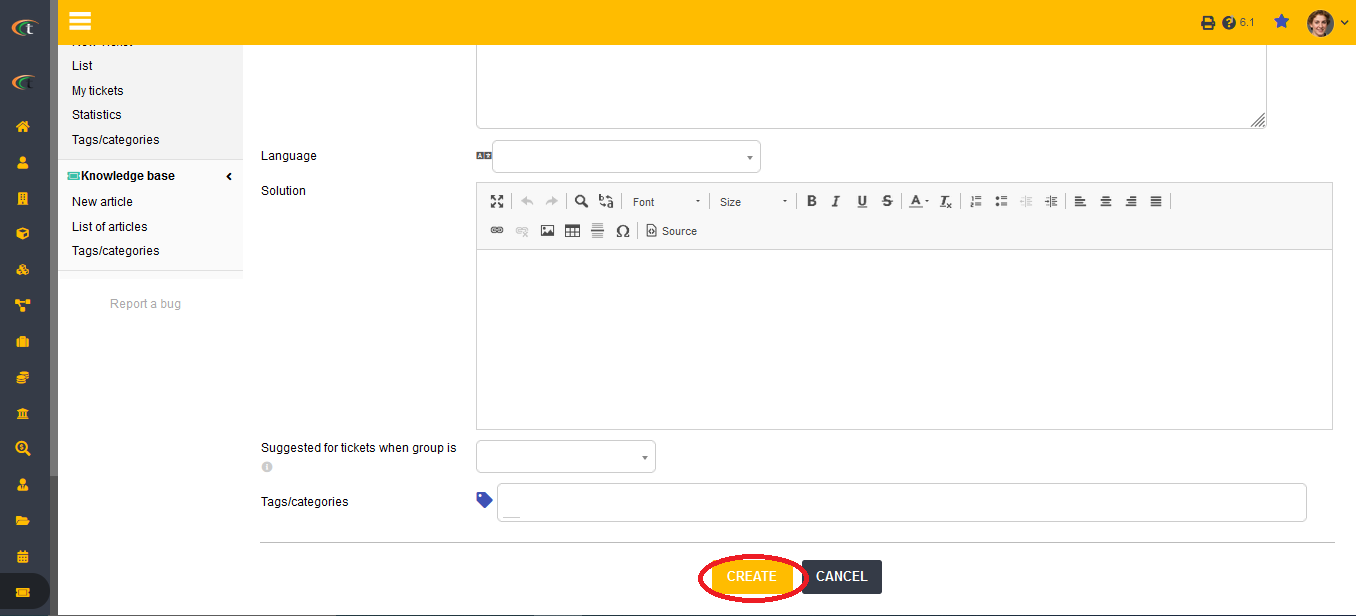
- Step 4: Click on “create” to complete creating the article.
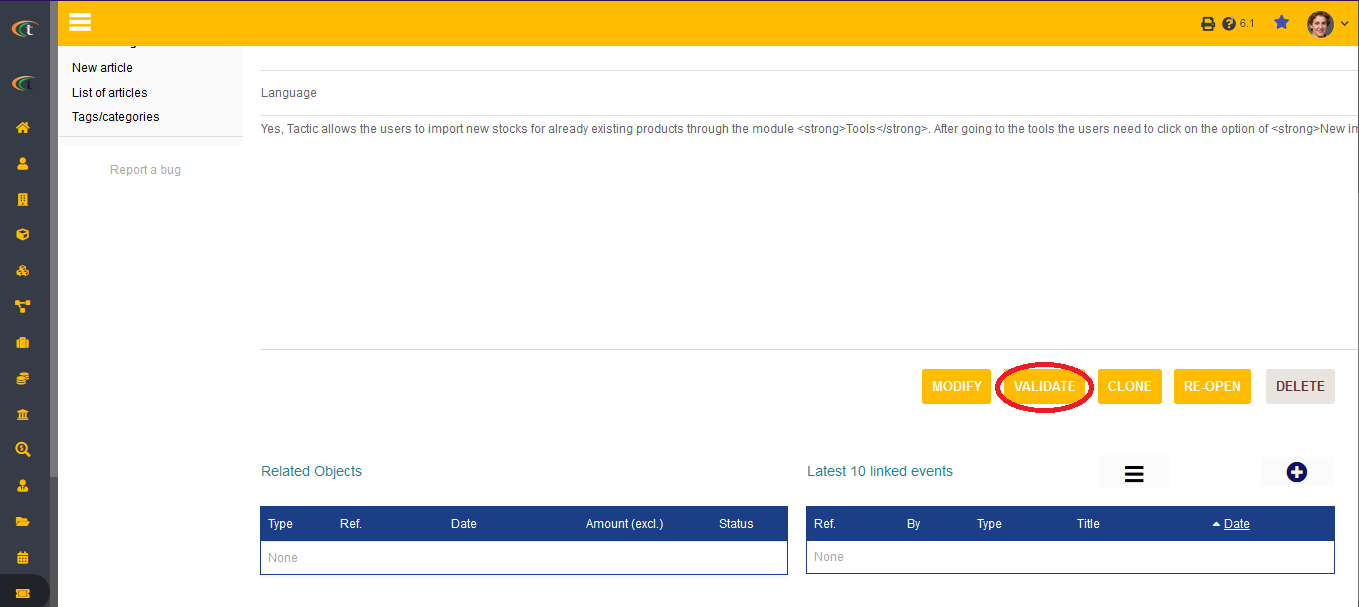
- Step 5: You need to click on “validate” for validating an article, by opening the article from “List of articles” submenu.
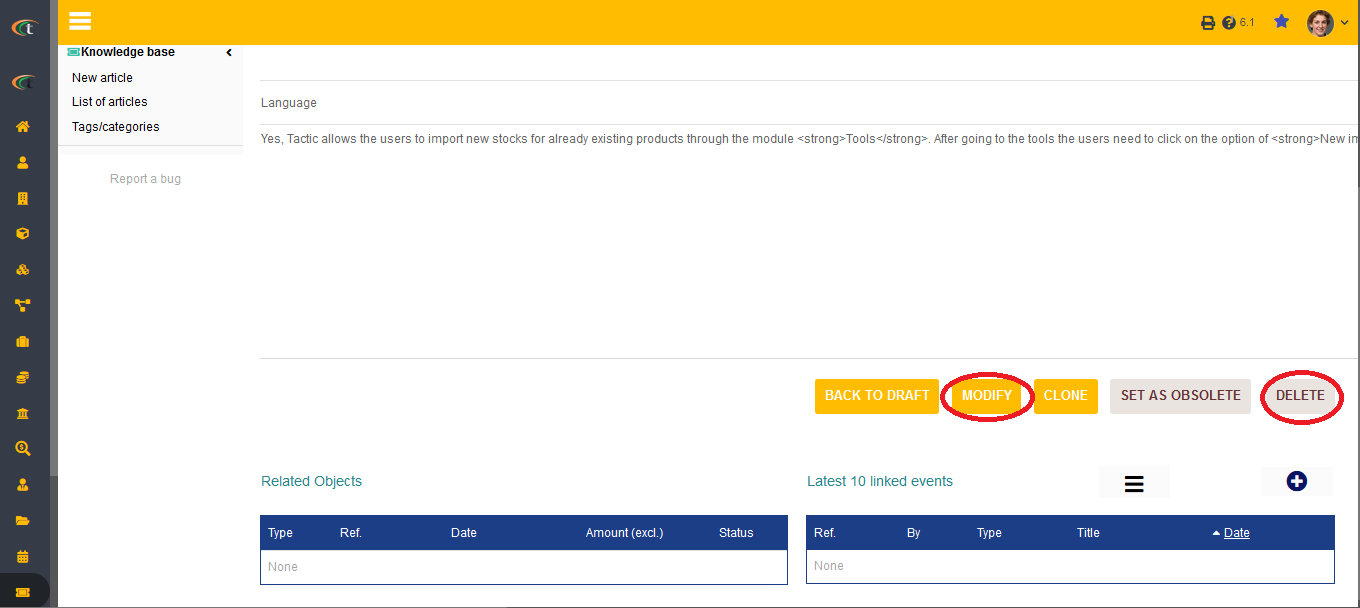
- Step 6: Click on “modify” to modify an article.
- Step 7: Similarly, clicking on “delete” will delete an article and clicking on “back to draft” will change its status back to draft.
You can visit Knowledge Base Tutorials to learn about the detailed process of creating and using knowledge base articles.