Difference between revisions of "Point Of Sale"
| (2 intermediate revisions by the same user not shown) | |||
| Line 53: | Line 53: | ||
== Adding different bank accounts == | == Adding different bank accounts == | ||
POS requires different terminals to work properly. Before start working with POS, you need to set up different terminals. And for each terminal you can set different bank accounts, for achieving it you need to follow a few steps, which are, Home -> setup -> websites and other frontal applications -> POS -> click on the cog sign -> choose the tab of your concerned terminal -> choose the bank account by clicking on the drop-down arrow -> save. All of your bank accounts will be saved. | POS requires different terminals to work properly. Before start working with POS, you need to set up different terminals. And for each terminal you can set different bank accounts, for achieving it you need to follow a few steps, which are, Home -> setup -> websites and other frontal applications -> POS -> click on the cog sign -> choose the tab of your concerned terminal -> choose the bank account by clicking on the drop-down arrow -> save. All of your bank accounts will be saved. | ||
Step 1 | |||
[[File:Bank_account_in_POS_1.PNG|center|link=]] | |||
Step 2 | |||
[[File:Bank_account_in_POS_2.PNG|center|link=]] | |||
Step 3 | |||
[[File:Bank_account_in_POS_3.PNG|center|link=]] | |||
Step 4 | |||
[[File:Bank_account_in_POS_4.PNG|center|link=]] | |||
Step 5 | |||
[[File:Bank_account_in_POS_5.PNG|center|link=]] | |||
= Other Information = | = Other Information = | ||
| Line 58: | Line 95: | ||
* You can also add constants to other setup to show category description | * You can also add constants to other setup to show category description | ||
* A constant for showing products in stock can be added as well. | * A constant for showing products in stock can be added as well. | ||
* POS module can work with more than one payment method. There are options of 5 payment methods, which are cash, check, credit card, debit payment order and delayed payment. The users can choose any suitable payment method as per their requirement. | |||
* While working with TakePOS, you can now see a list of all the available currencies and choose your preferred one to work with. All you need to do is to open TakePOS module from the main menu, choose your terminal and open the interface. There you will see a ‘currency’ option in the header. Upon clicking on the option, you will find out a list containing all the available currencies, choose the one you need to work with and you will be all set. | |||
Latest revision as of 07:37, 5 October 2024
Introduction
Point of Sale is considered as a critical point of purchase that refers to a location where the customers execute payments for goods and services. In this location the sales taxes are also payable. Point of sales can be physical stores with POS terminals and systems to process card payments or it can be virtual sales point for eliminating the importance of physical presence. TakePOS module enhances user experience by hosting advanced features in the module. The TakePOS module helps in turning Tactic into a user friendly POS with more enhanced features. The most effective features of the TakePOS module are:
- Management of bars and restaurants
- Management of parallel sales
- Multi-payment mode and more.
Installation
There is no need of installing this module, as it is already included within Tactic services.
Setup
For using this module the users need to enable it by using an administrator account. The menu options for activating this module are: Home –> Setup – > Module. The users then need to click on Activate. The modules will be activated after completing this step. The settings icon will be visible at the end of the module box, the users can click in that to access further setup for this module for accessing the functionalities in a better way.
Using TakePOS
- The users need to access the POS setup first. It is important to set the terminal numbers and the products that will be sold through the POS before starting to use the module.
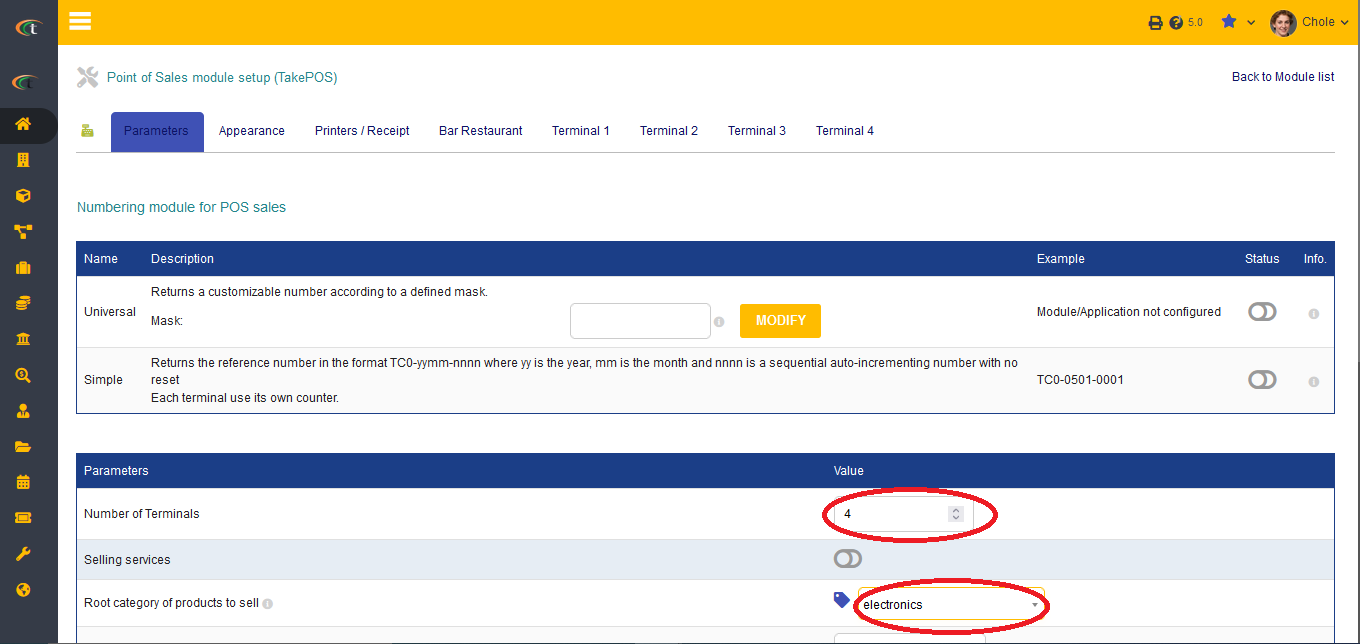
- The users need to set-up the accounts going to each terminal as well.
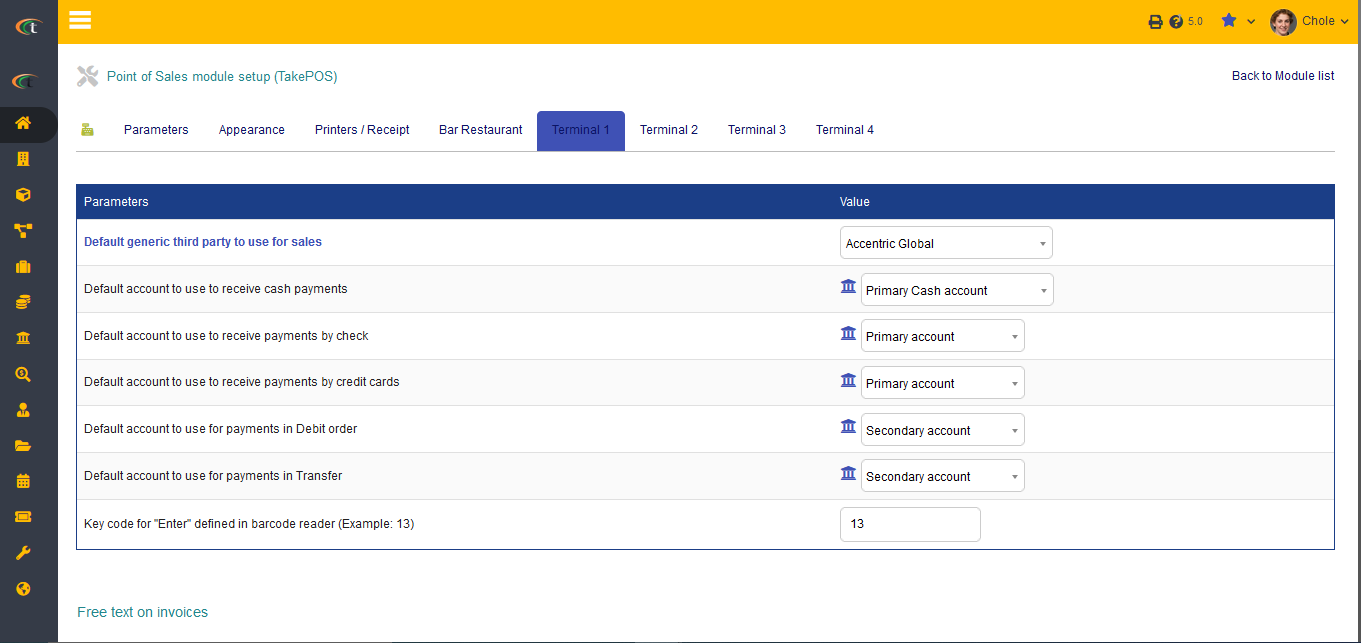
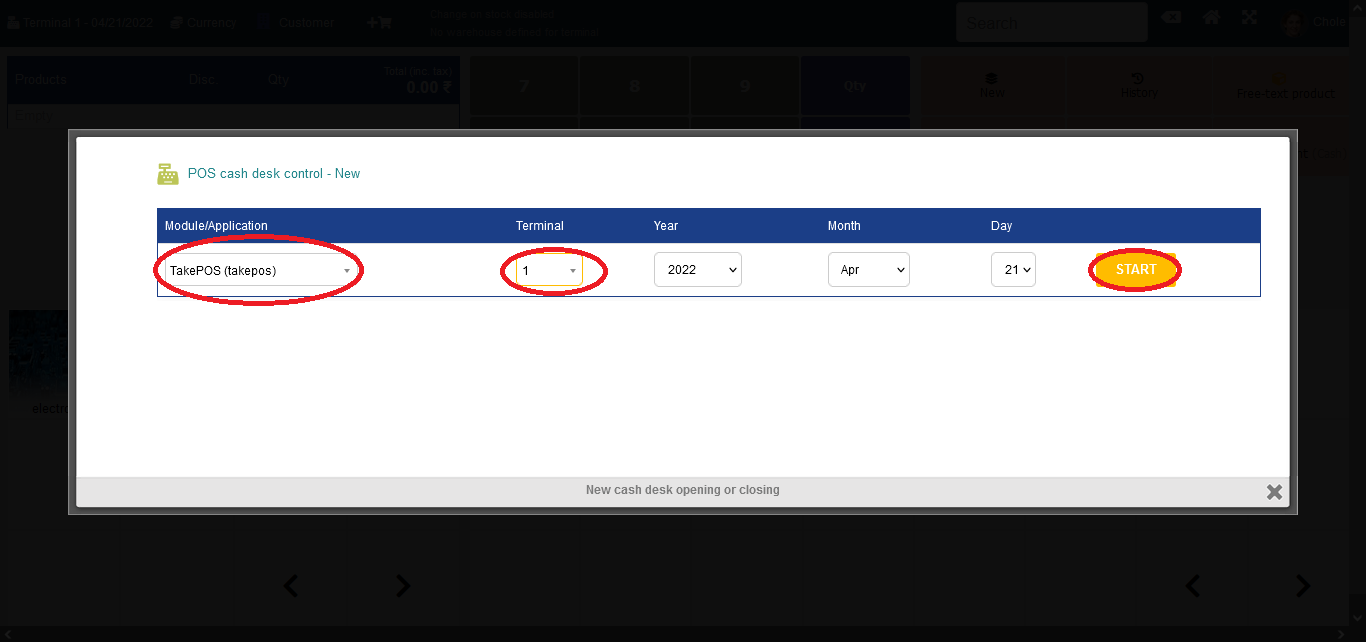
- For using the module the users need to choose the TakePOS module from the main menu bar.
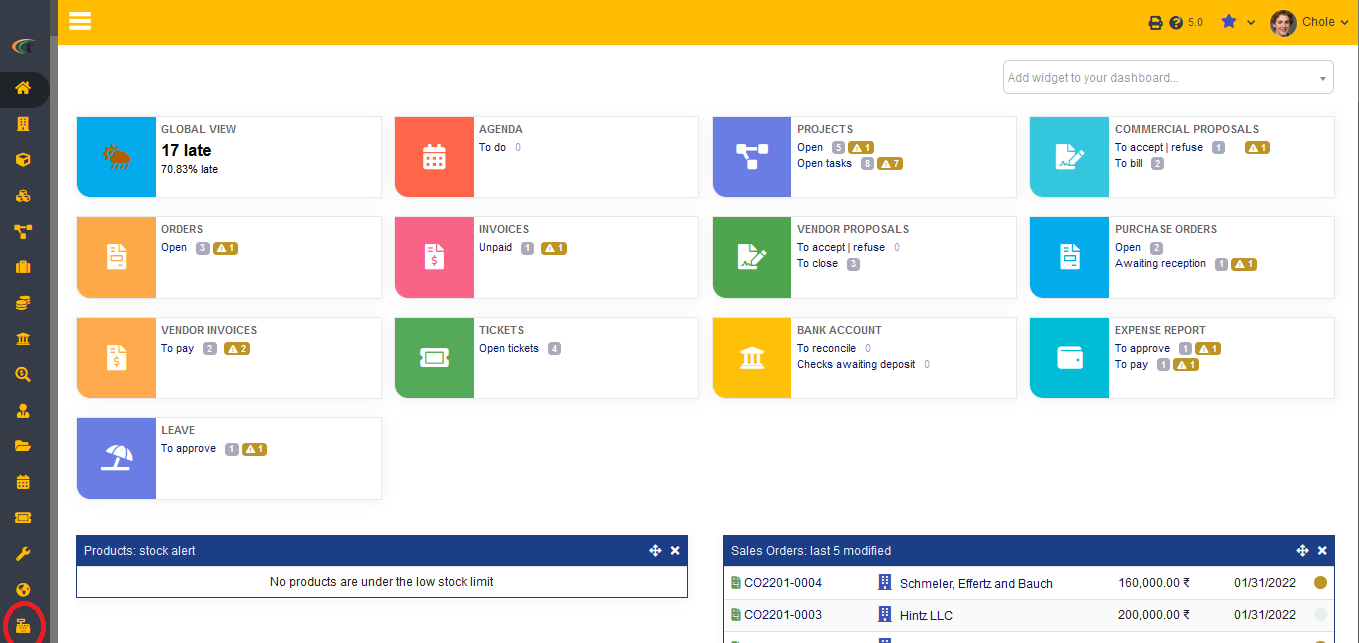
- A different window will be open upon clicking on the TakePOS module.
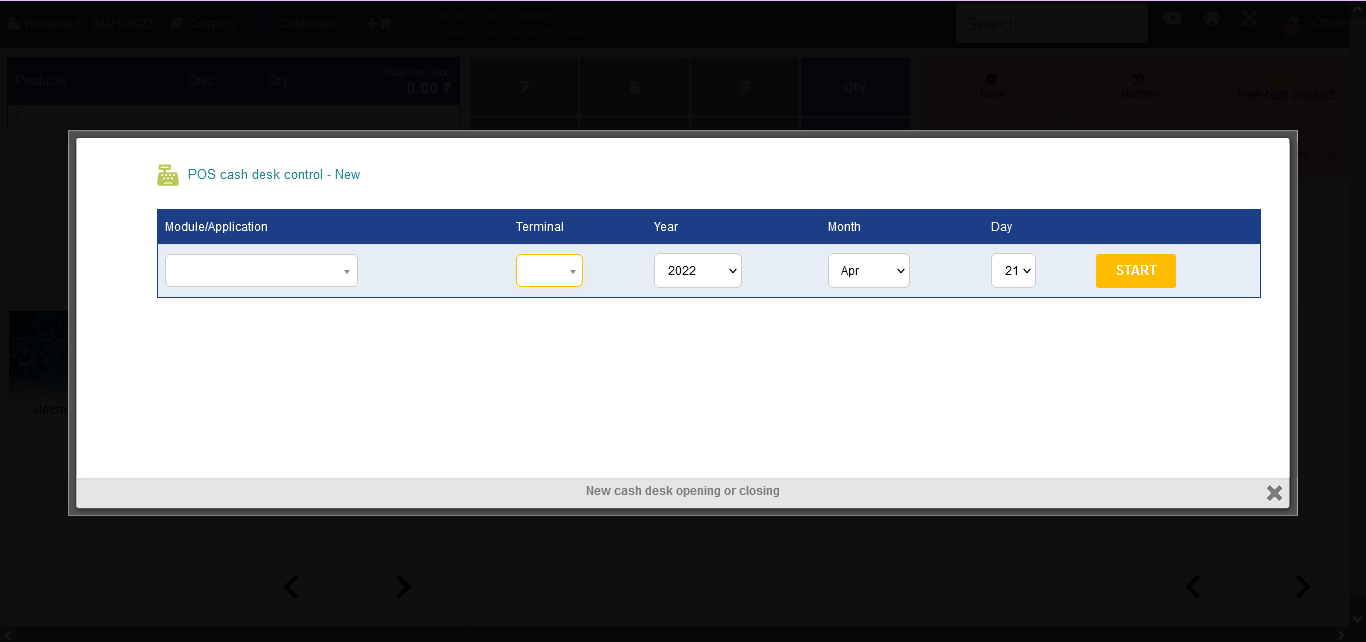
- The users need to choose the right terminal and proceed with the option of Start.
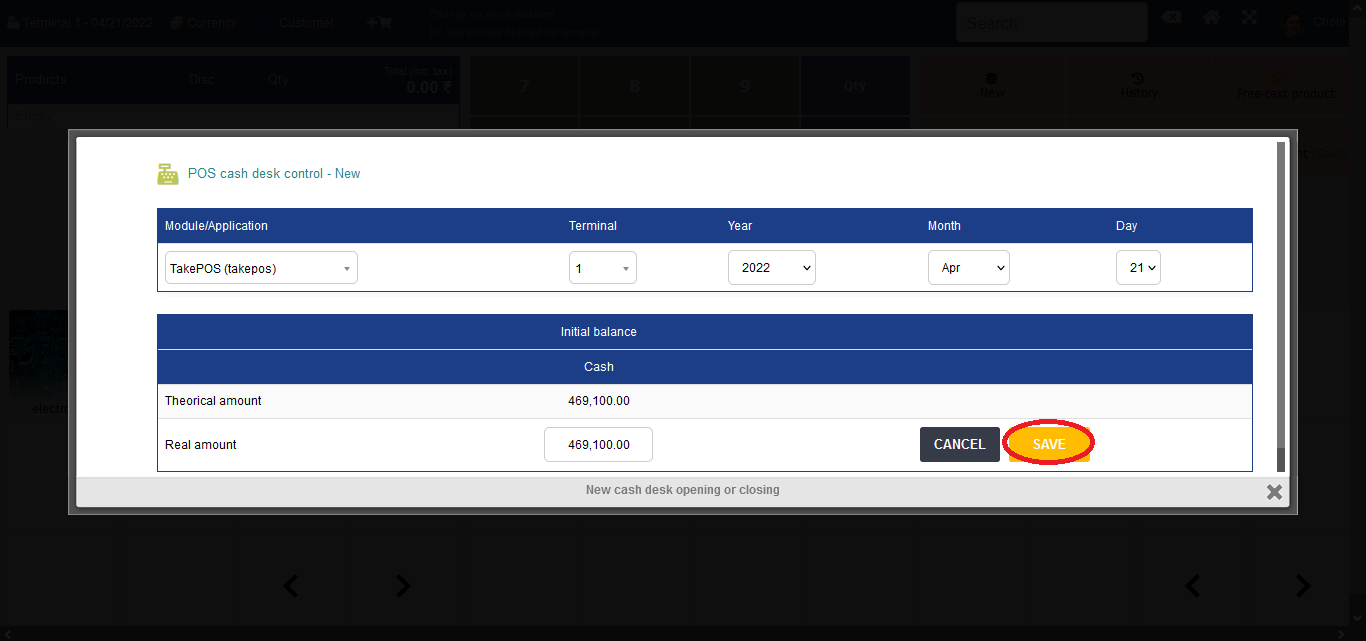
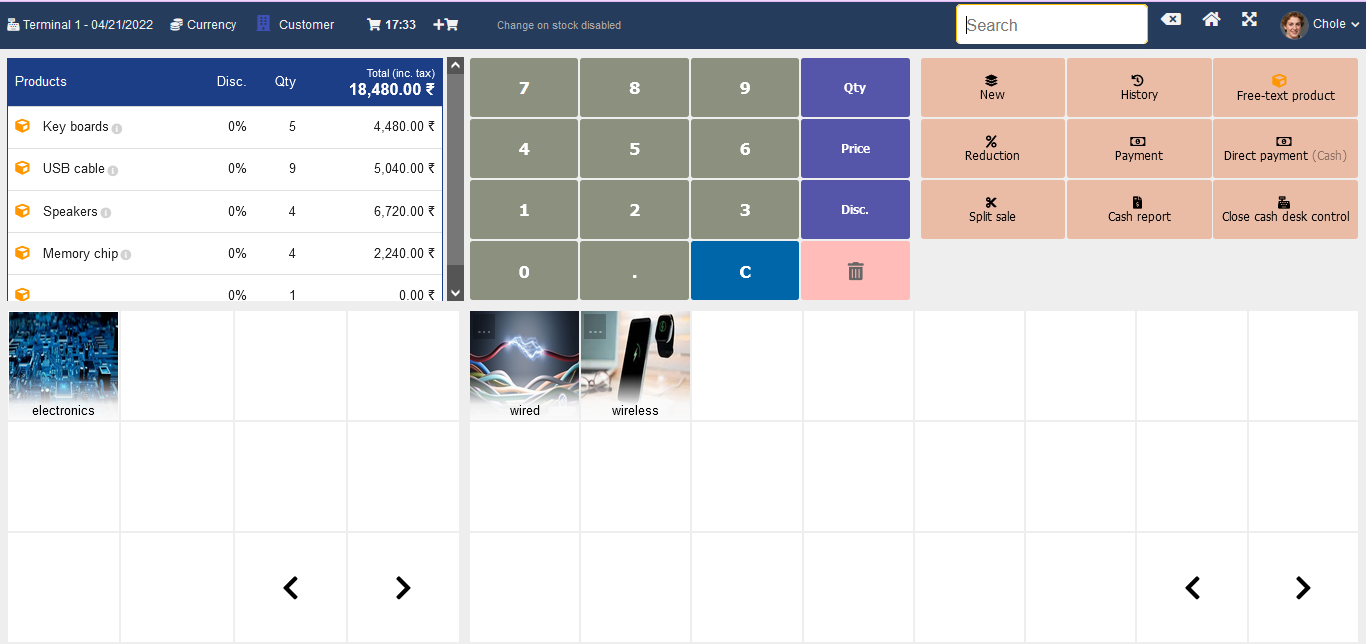
- After saving the initial balance, the users will be all ready to use TakePOS.
Adding different bank accounts
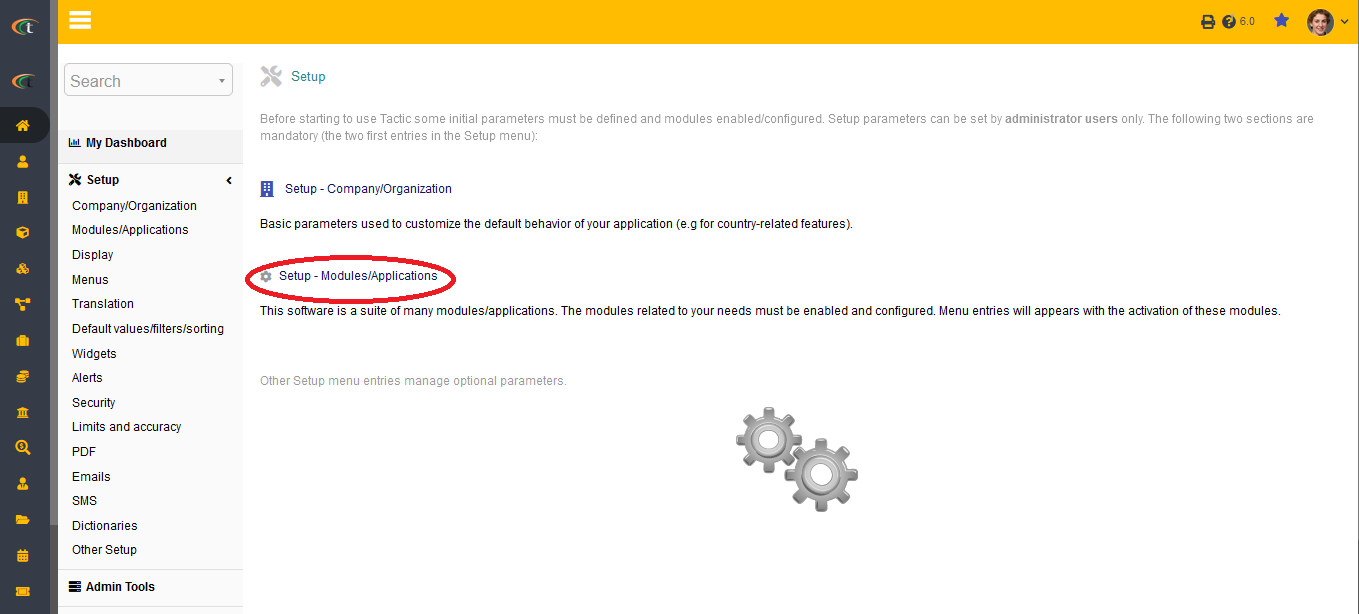
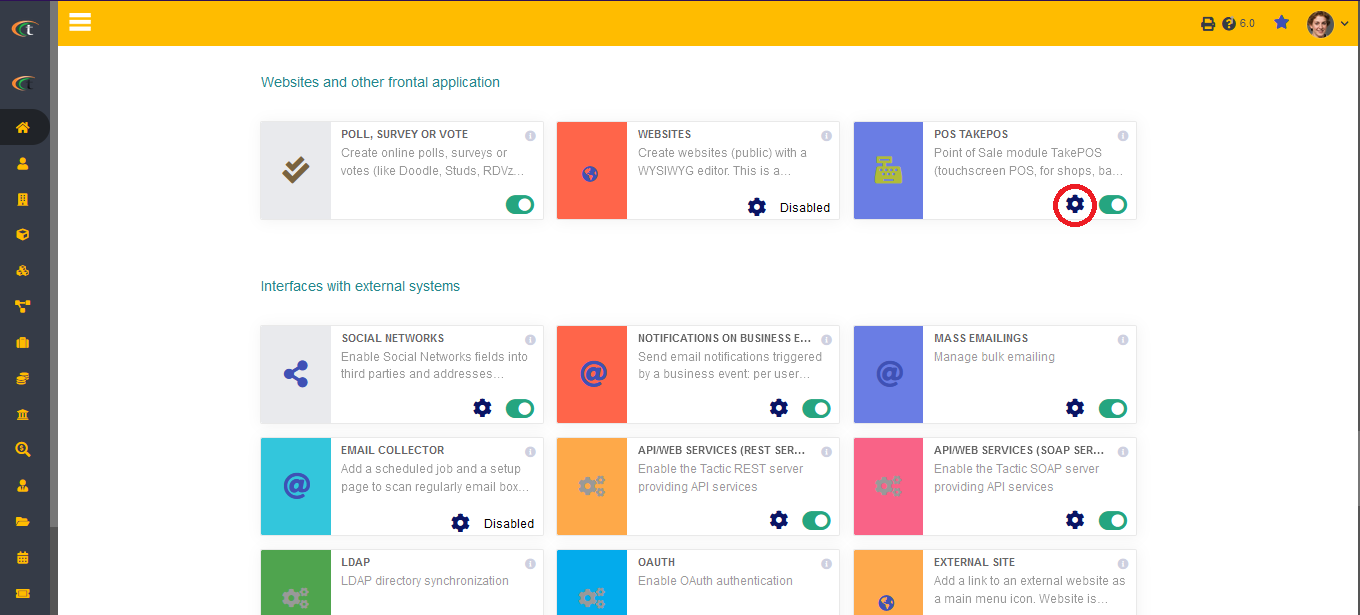
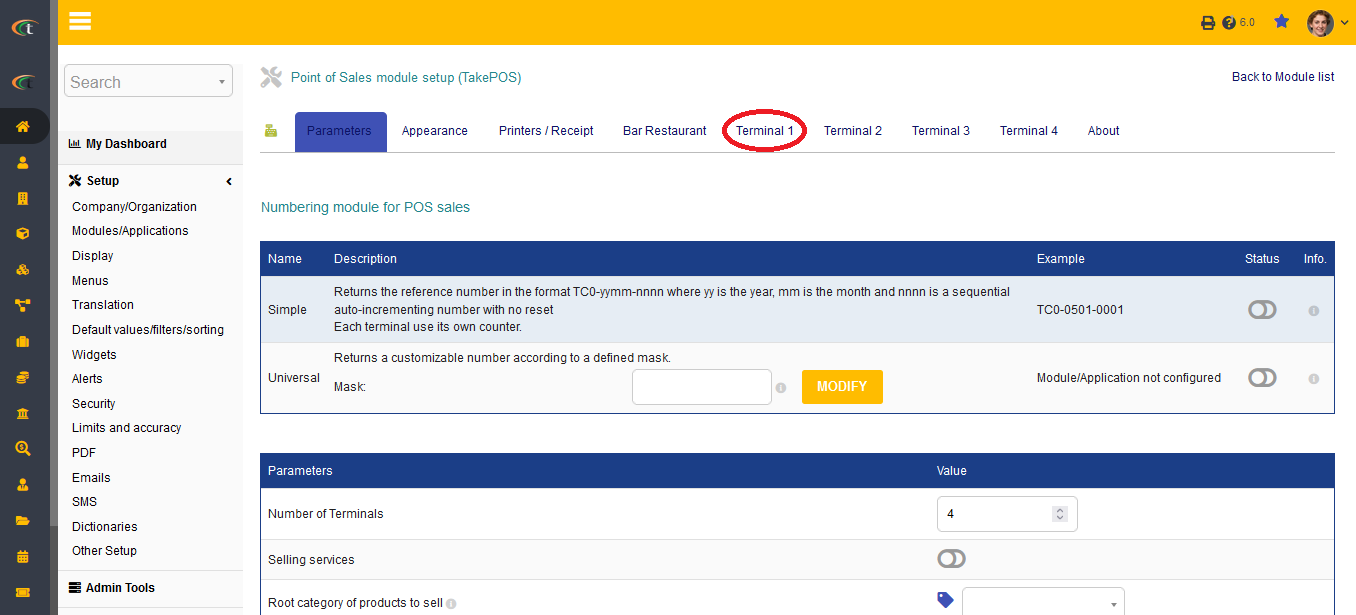
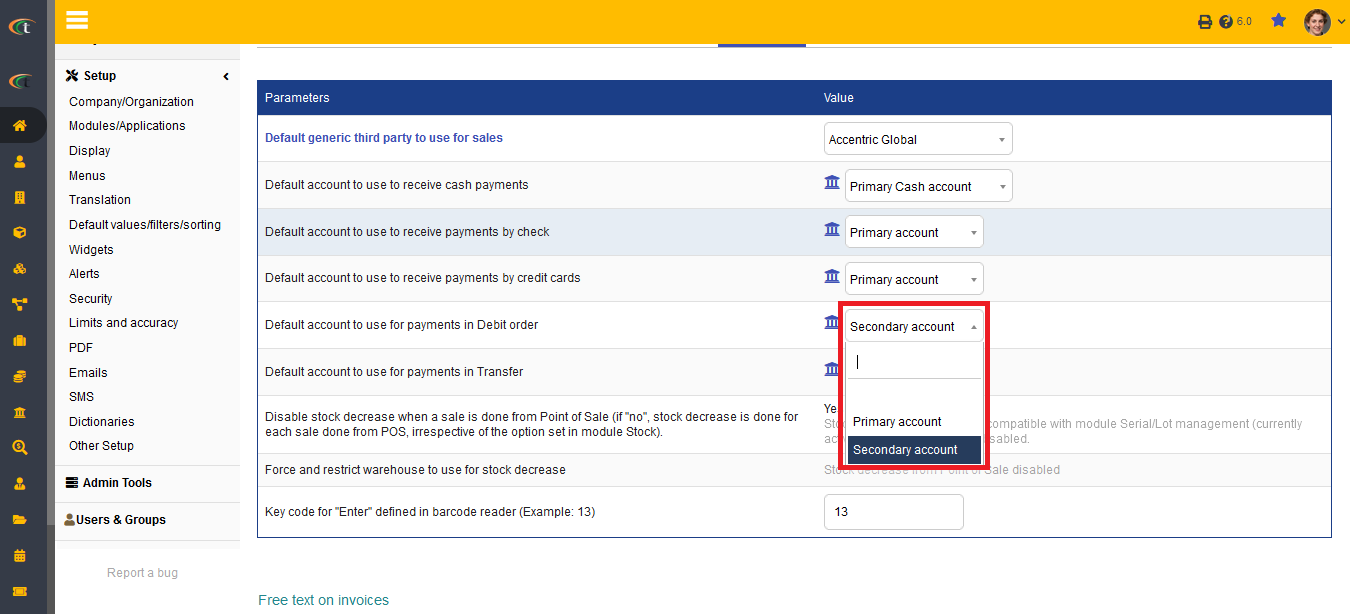
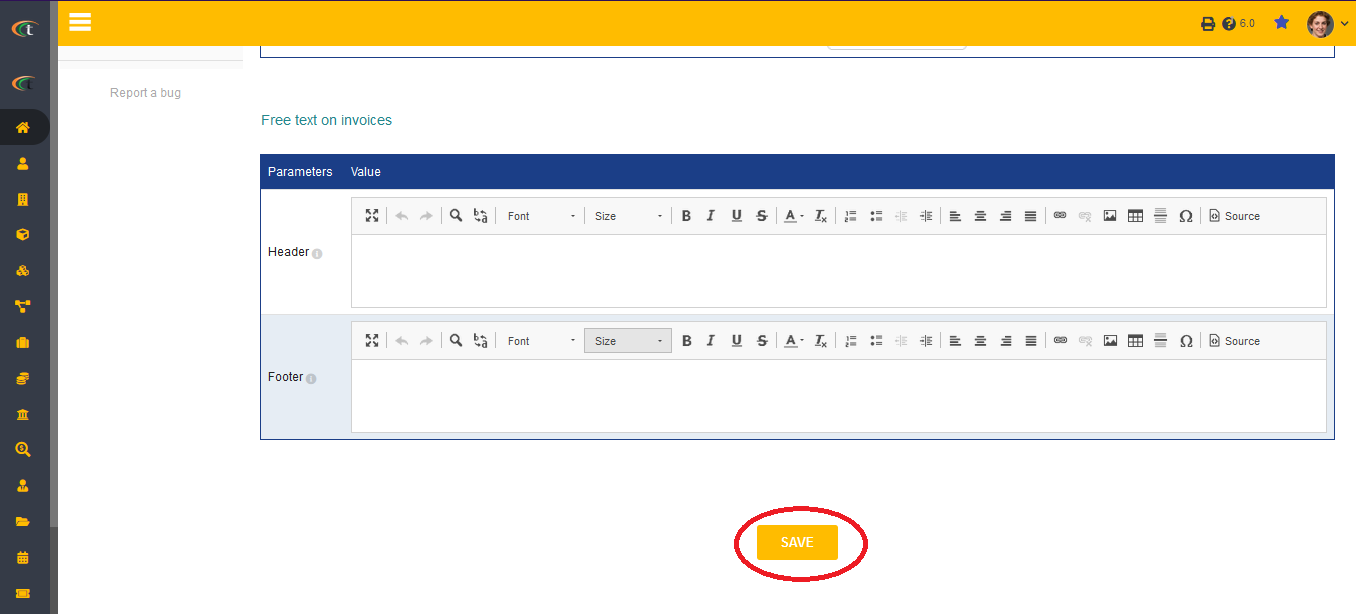
POS requires different terminals to work properly. Before start working with POS, you need to set up different terminals. And for each terminal you can set different bank accounts, for achieving it you need to follow a few steps, which are, Home -> setup -> websites and other frontal applications -> POS -> click on the cog sign -> choose the tab of your concerned terminal -> choose the bank account by clicking on the drop-down arrow -> save. All of your bank accounts will be saved.
Step 1
Step 2
Step 3
Step 4
Step 5
Other Information
- The product references are shown in TakePOS section.
- You can also add constants to other setup to show category description
- A constant for showing products in stock can be added as well.
- POS module can work with more than one payment method. There are options of 5 payment methods, which are cash, check, credit card, debit payment order and delayed payment. The users can choose any suitable payment method as per their requirement.
- While working with TakePOS, you can now see a list of all the available currencies and choose your preferred one to work with. All you need to do is to open TakePOS module from the main menu, choose your terminal and open the interface. There you will see a ‘currency’ option in the header. Upon clicking on the option, you will find out a list containing all the available currencies, choose the one you need to work with and you will be all set.