Difference between revisions of "Intervention Module"
| (7 intermediate revisions by 2 users not shown) | |||
| Line 5: | Line 5: | ||
There is no need of installing this module, as it is already included within Tactic services. | There is no need of installing this module, as it is already included within Tactic services. | ||
= Setup = | = Setup = | ||
For using this module the users need to enable it by using an administrator account. The menu options for activating this module are: '''Home –> Setup – > Module'''. The users then need to click on '''Activate'''. The modules will be activated after completing this step. The settings icon {{#fas:cog}} will be visible at the end of the module box, the users can click in that to access setup. | For using this module the users need to enable it by using an administrator account. The menu options for activating this module are: '''Home –> Setup – > Module'''. The users then need to click on '''Activate'''. The modules will be activated after completing this step. The settings icon {{#fas:cog}} will be visible at the end of the module box, the users can click in that to access further setup for this module to access the functionalities in a better way. | ||
= Creation of an intervention = | = Creation of an intervention = | ||
| Line 11: | Line 11: | ||
[[File:Intervention_1.PNG|center]] | [[File:Intervention_1.PNG|center|link=]] | ||
The users need to click on the option of '''Modify''' for modifying the intervention. | The users need to click on the option of '''Modify''' for modifying the intervention. | ||
[[File:Intervention_2.PNG|center]] | |||
[[File:Intervention_2.PNG|center|link=]] | |||
Interventions can also be generated from time-spent on projects and tasks. | |||
== Adding attachment to an intervention == | |||
If you want to add any file or document to your interventions, then it can be achieved by following a few steps. Those steps are commerce (from main menu) -> Interventions -> list -> choose the concerned intervention -> Linked files tab -> Attach files/documents -> Browse -> choose the file you want to attach -> upload. | |||
Step 1 | |||
[[File:Intervention_attachment.PNG|center|link=]] | |||
Step 2 | |||
[[File:Intervention_attachment_2.PNG|center|link=]] | |||
== Adding online signature == | |||
You can now enable online signing for interventions. This will allow your customers or vendors to sign the interventions without having to print it out. You need to enable the online signing to set up first by going to home -> setup -> customer relationship management -> intervention module box -> click on the cog sign -> go to the parameters -> find the option of “allow online signing” -> tick the box -> click on modify. The new setup will be saved. | |||
Now you can open your preferred intervention card and scroll down towards the end of the page to find out the online signature link. The link will redirect you to an external page for completing your online signature. However, this will only apply when your intervention if validated, otherwise no online signature is possible. | |||
= Sending intervention via email = | |||
You can send intervention cards via emails. For that you need to go to commerce menu -> intervention -> list -> choose the intervention -> send email -> fill all the needed criteria and modify as per your requirements -> send email. The intervention card will be sent as an email attachment to the recipient. | |||
Latest revision as of 09:36, 15 October 2024
Introduction
Intervention cards can be considered as an equivalent term for managing certain request that need to be performed without any delay. An organisation certainly has some valued customer or members, whose requests need to be processed without causing any delay. Thus, the intervention module helps the users in managing those important services of requests by highlighting their importance. The same service is provided by Tactic as well. Interventions are considered as a form of service and maintenance orders, which helps the users to manage their business related important elements effectively without having to face much issues.
Installation
There is no need of installing this module, as it is already included within Tactic services.
Setup
For using this module the users need to enable it by using an administrator account. The menu options for activating this module are: Home –> Setup – > Module. The users then need to click on Activate. The modules will be activated after completing this step. The settings icon will be visible at the end of the module box, the users can click in that to access further setup for this module to access the functionalities in a better way.
Creation of an intervention
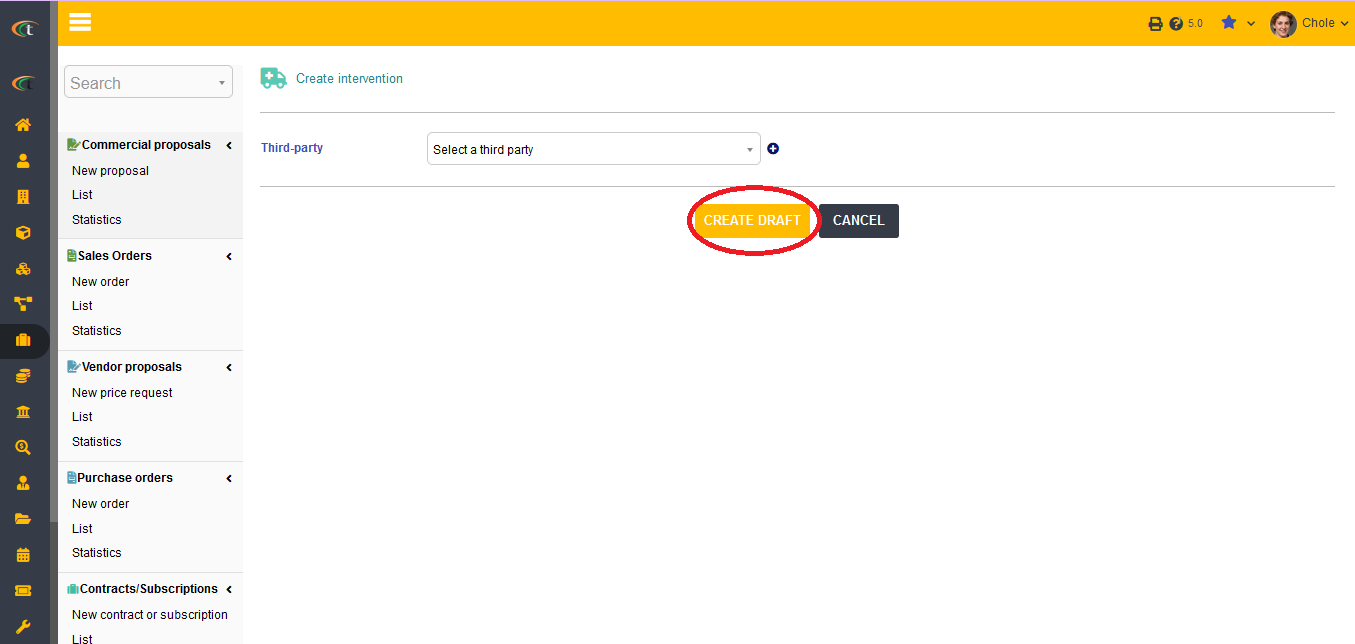
Creation of an intervention can be done from projects and proposals. This can be completed within a very few small steps. However, the creation of intervention can be executed by going to the commerce menu from the Tactic tab. the users need to click on the new Intervention option in order to create a new intervention.

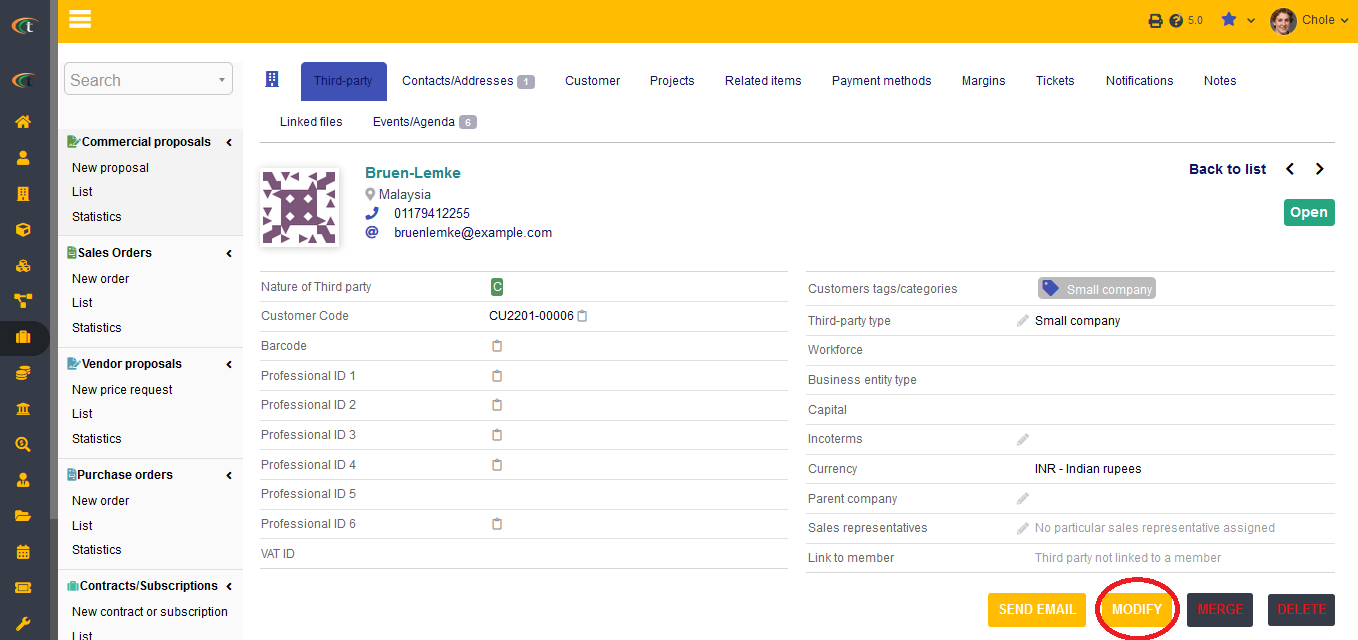
The users need to click on the option of Modify for modifying the intervention.

Interventions can also be generated from time-spent on projects and tasks.
Adding attachment to an intervention
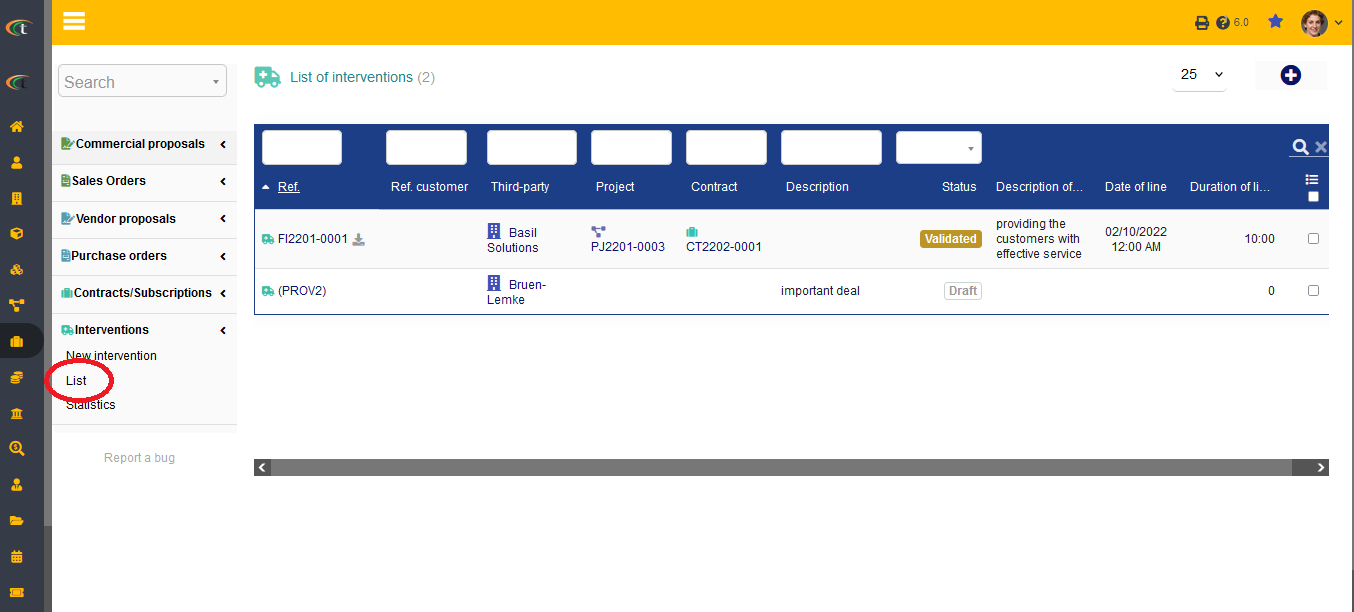
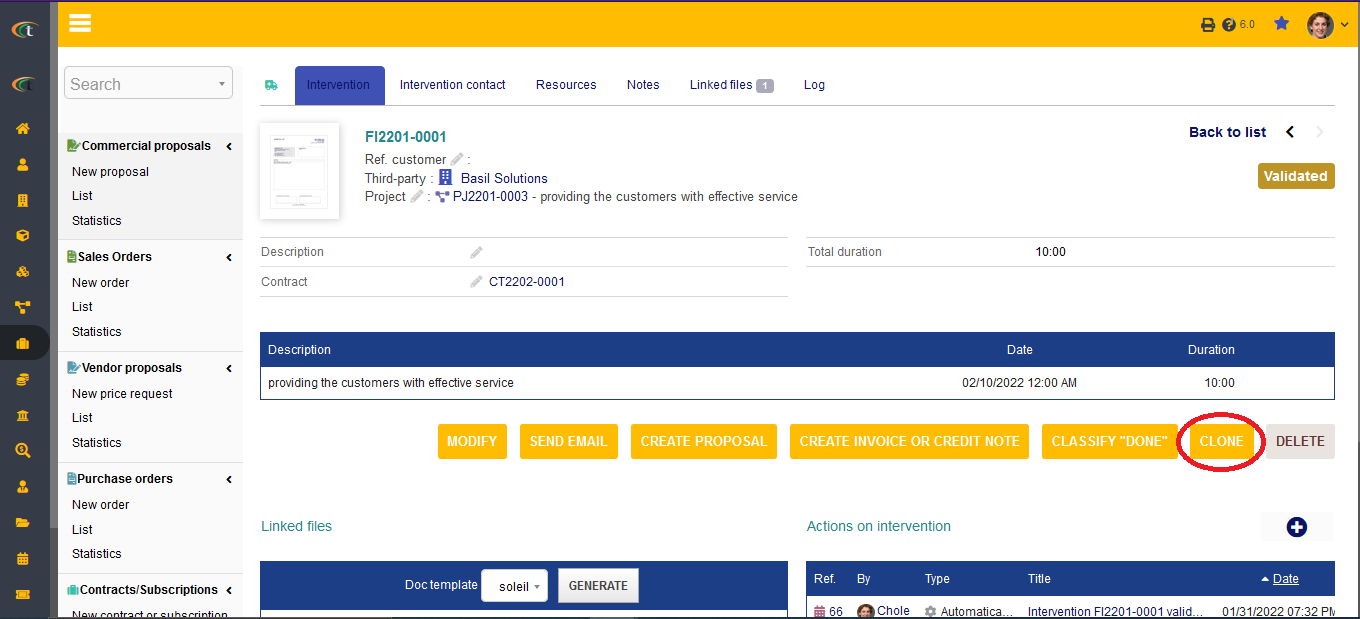
If you want to add any file or document to your interventions, then it can be achieved by following a few steps. Those steps are commerce (from main menu) -> Interventions -> list -> choose the concerned intervention -> Linked files tab -> Attach files/documents -> Browse -> choose the file you want to attach -> upload.
Step 1

Step 2

Adding online signature
You can now enable online signing for interventions. This will allow your customers or vendors to sign the interventions without having to print it out. You need to enable the online signing to set up first by going to home -> setup -> customer relationship management -> intervention module box -> click on the cog sign -> go to the parameters -> find the option of “allow online signing” -> tick the box -> click on modify. The new setup will be saved.
Now you can open your preferred intervention card and scroll down towards the end of the page to find out the online signature link. The link will redirect you to an external page for completing your online signature. However, this will only apply when your intervention if validated, otherwise no online signature is possible.
Sending intervention via email
You can send intervention cards via emails. For that you need to go to commerce menu -> intervention -> list -> choose the intervention -> send email -> fill all the needed criteria and modify as per your requirements -> send email. The intervention card will be sent as an email attachment to the recipient.