Difference between revisions of "Tickets Module"
| Line 75: | Line 75: | ||
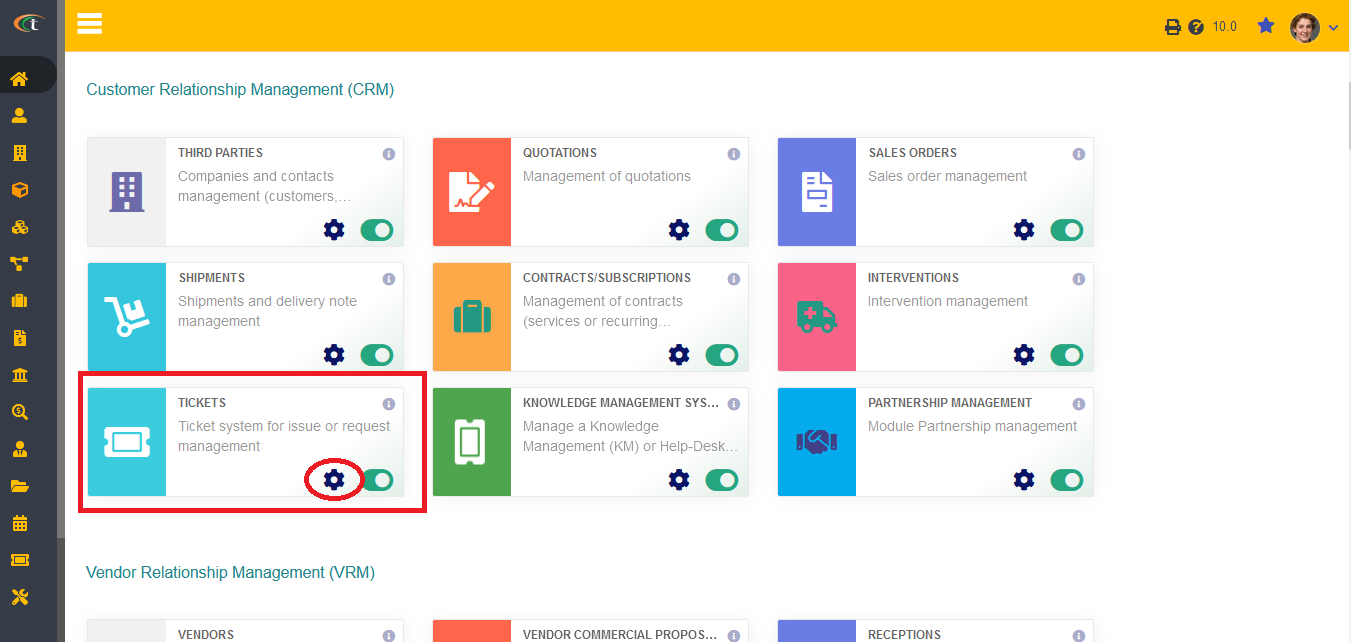
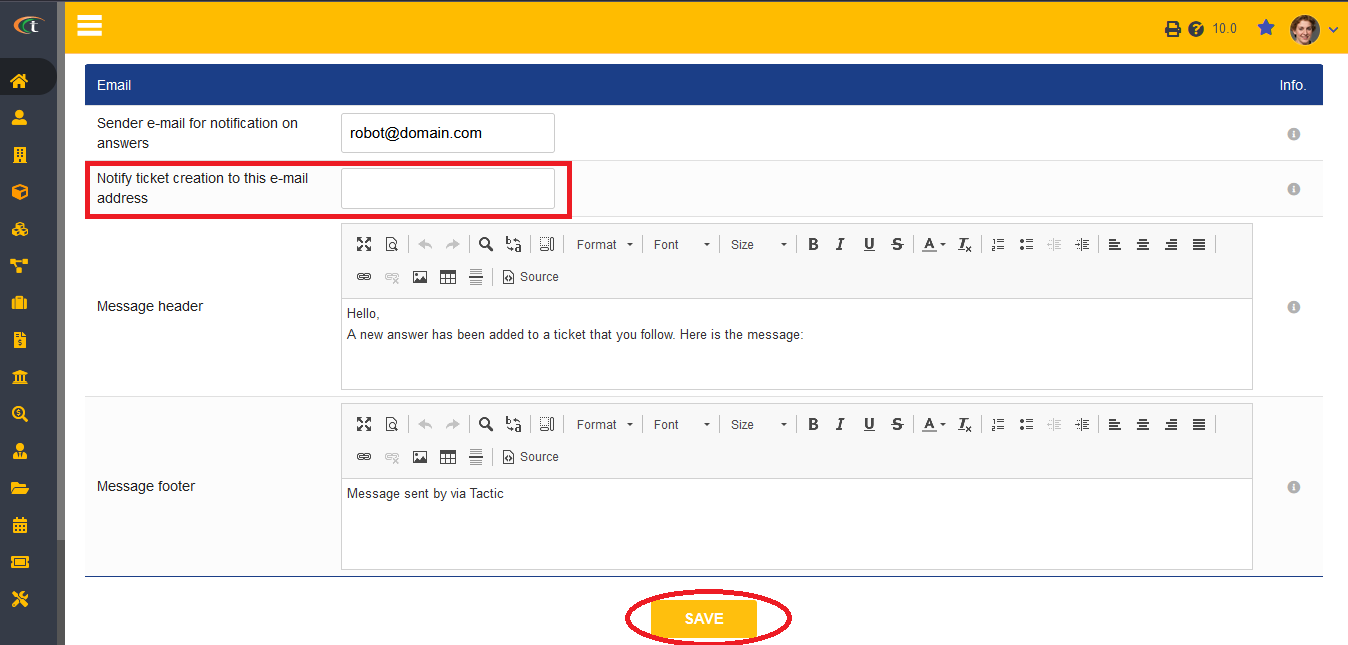
For enabling notification on a ticket creation, you need to go to home -> setup -> modules and applications -> Ticket module under CRM -> click on the cog sign. Once the settings page opens, you will find several tables under different parameters. Scroll down to notification parameter, where you will see an option referring to ‘Notify ticket creation to this e-mail address’, put your preferred email Id on that box and click on save. | For enabling notification on a ticket creation, you need to go to home -> setup -> modules and applications -> Ticket module under CRM -> click on the cog sign. Once the settings page opens, you will find several tables under different parameters. Scroll down to notification parameter, where you will see an option referring to ‘Notify ticket creation to this e-mail address’, put your preferred email Id on that box and click on save. | ||
Once you are done, your changes will be saved. | Once you are done, your changes will be saved. | ||
[[File:Ticket-assigned-1.PNG|center|link=]] | |||
[[File:Ticket-assigned-2.PNG|center|link=]] | |||
Latest revision as of 08:01, 28 October 2024
Introduction
The term “Tickets” are used in CRM services to refer to the documents that are associated with customer requests and interaction over a specific time. Tickets can be helpful in providing the customers with effective services and in taking proper care of the issues that the potential customers have been facing. Hence, the organisations need to manage the tickets without allowing any error for enhancing the “Customer-Company” relationship. Tactic helps the organisations in executing the same by providing them with a service of ticket management with ticket module. Ticket module of Tactic provides a service of creating tickets that are important in business.
Installation
There is no need of installing this module, as it is already included within Tactic services.
Setup
For using this module the users need to enable it by using an administrator account. The menu options for activating this module are: Home –> Setup – > Module. The users then need to click on Activate. The modules will be activated after completing this step. The settings icon will be visible at the end of the module box, the users can click in that to access further setup for this module to access the functionalities in a better way.
Creation of a new ticket
For creating a new ticket the users need to go the Ticket menu and choose the New Ticket option. Tickets can be modified from the Modify option. Tactic provides an option of creating an intervention directly from the tickets as well. Tickets can be deleted from Delete option as well.
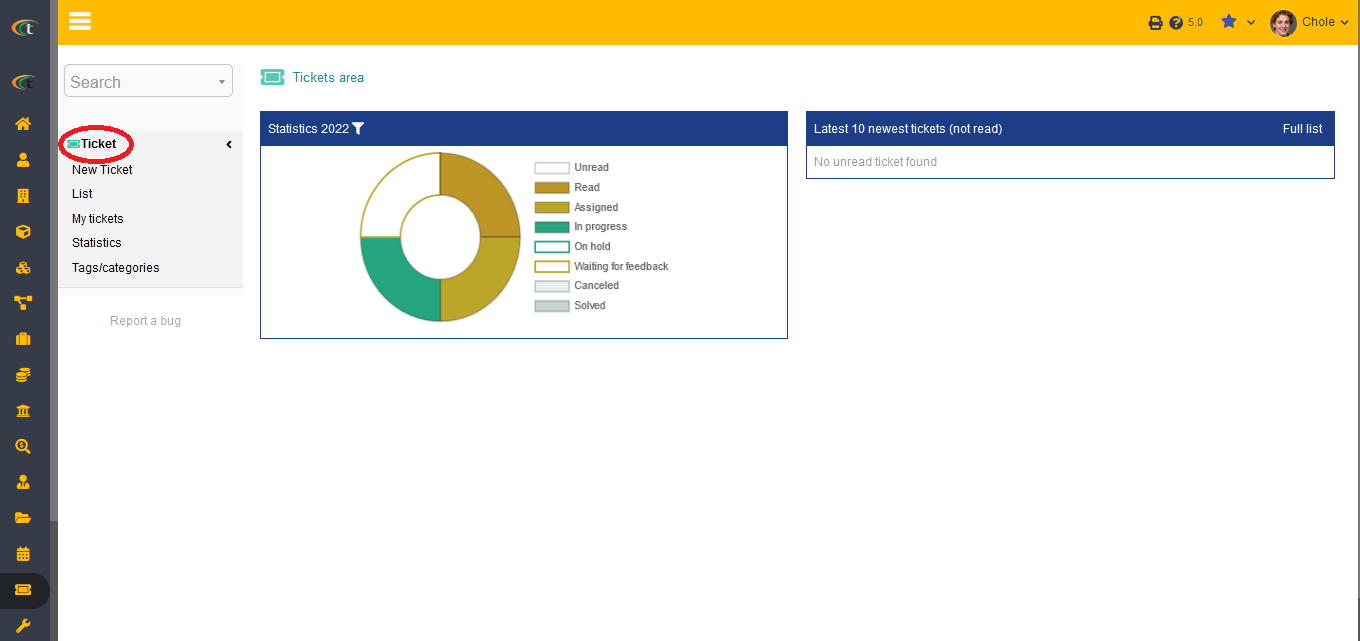
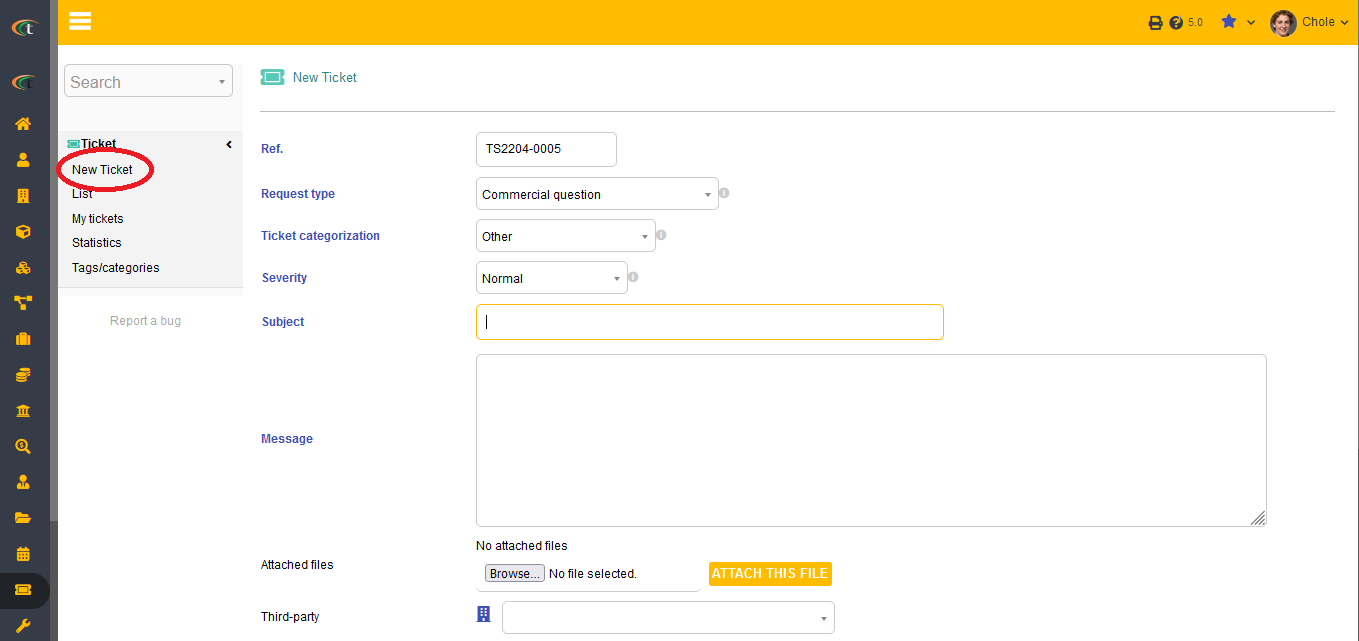
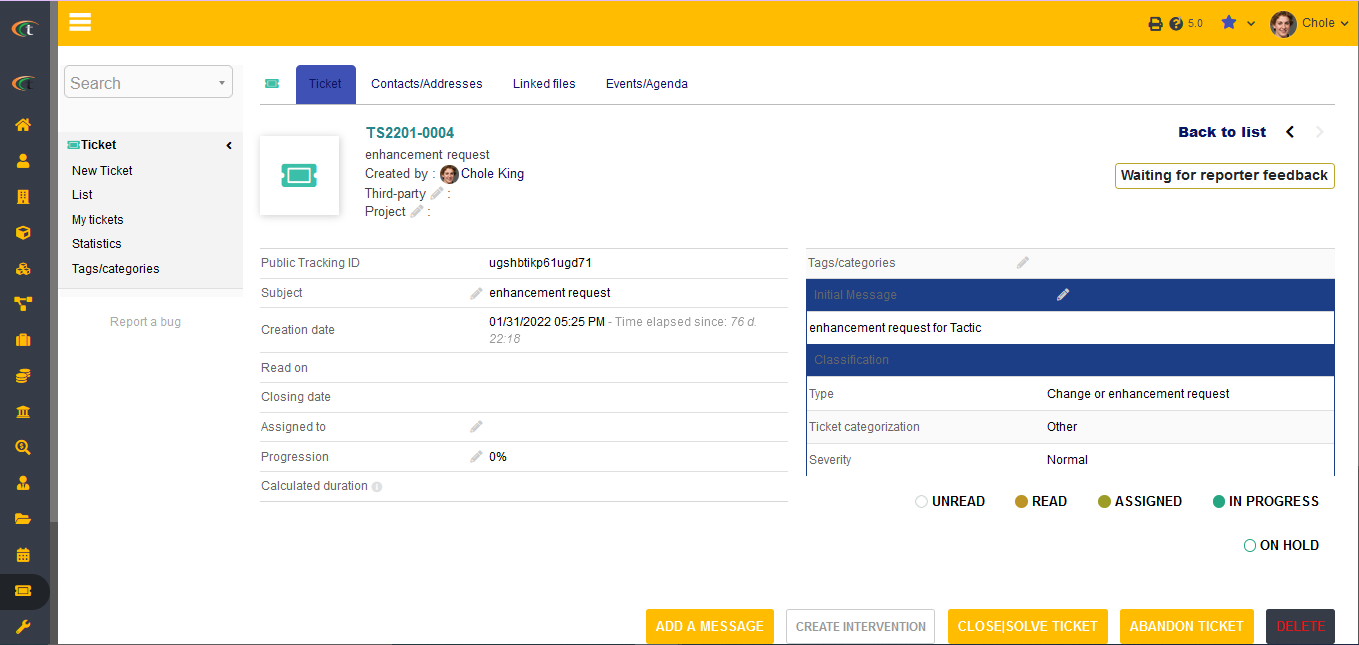
You can even add tags to your tickets to make it simple to resolve issues by the type of it. Messages are usually shown on the ticket card. Once you add messages to a ticket, those are shown in the ticket card.
Creation of a ticket, but in public interface
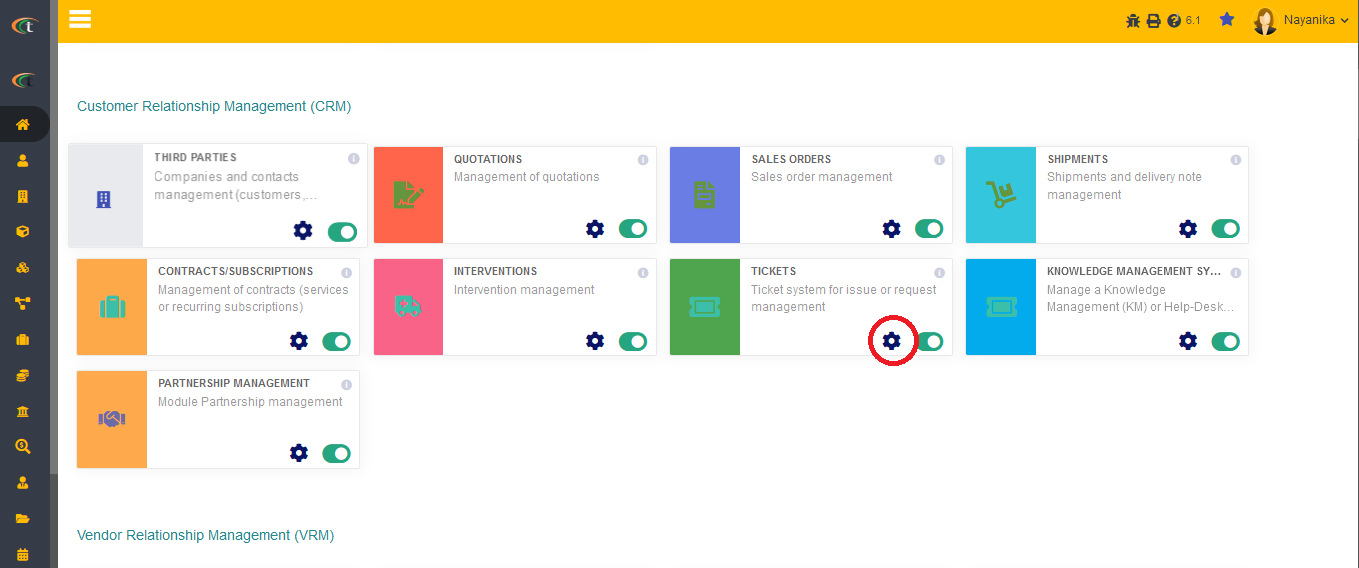
Tactic has looked forward to enhance the users’ experience by providing them with the opportunity of creating tickets from the public interface with the assistance of captcha. The users can also protect the public page with captcha. For executing this the users need to go to the Home tab and then choose the option of steup, after that tickets from Customer relationship management. The next steps are provided below,
- Step 1: Click on the cog sign to manage setup.
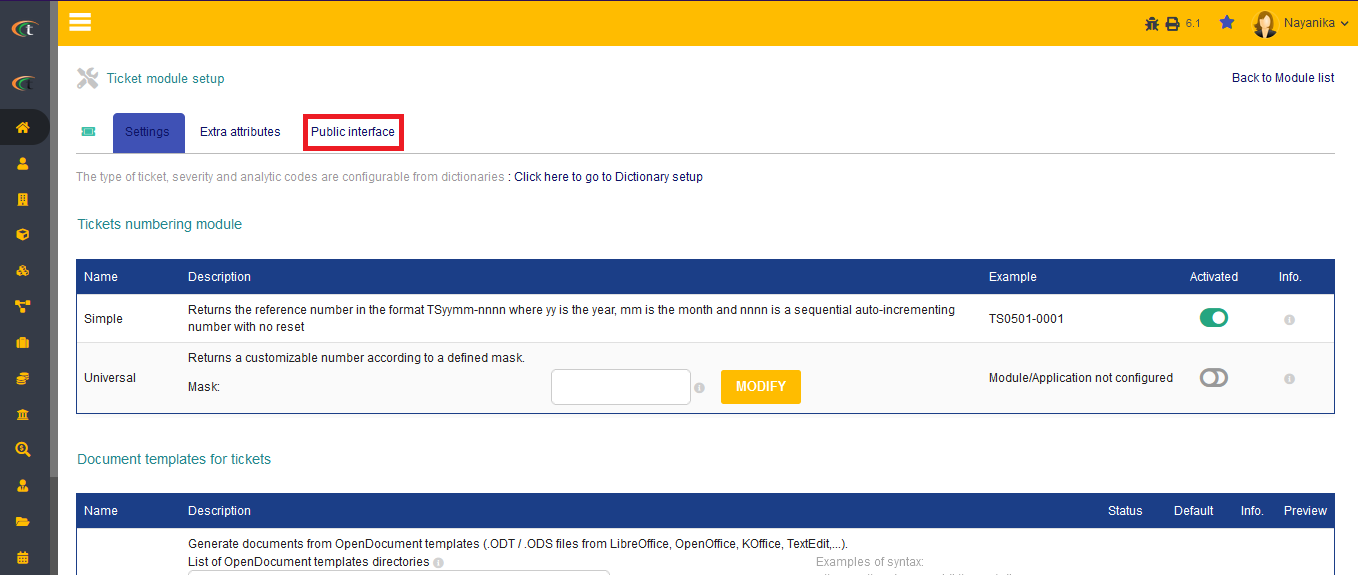
- Step 2: Click on the "public interface" tab.
- Step 3: Activate it.
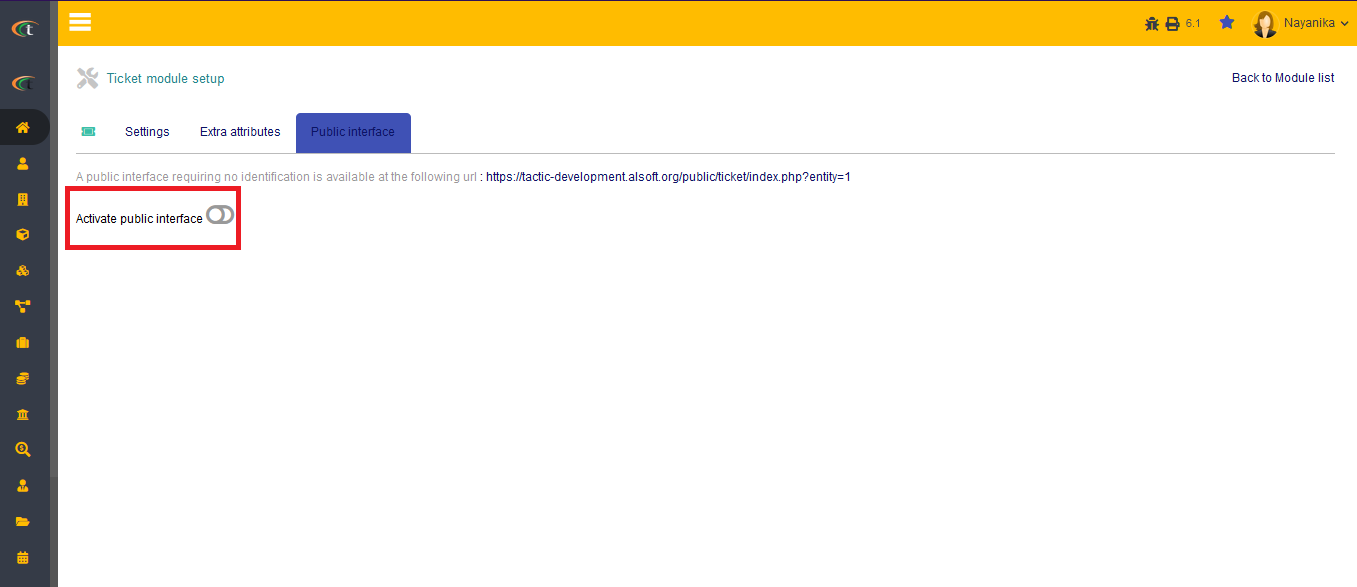
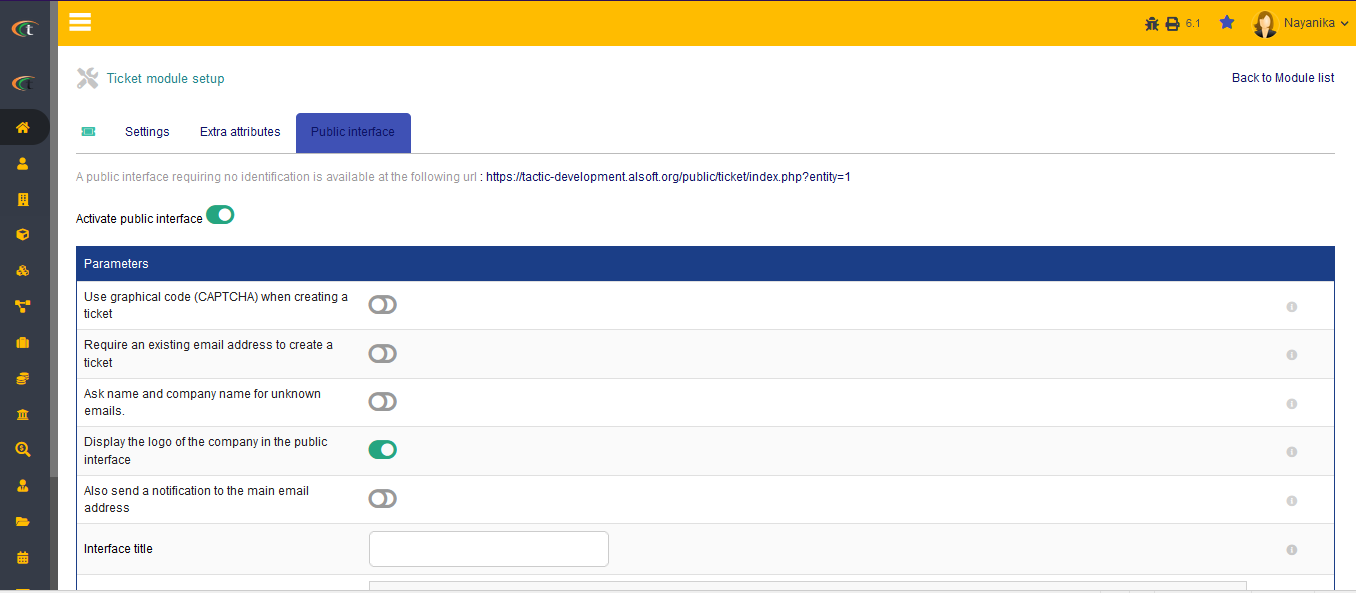
- You can now access tickets from the public interface by clicking on the URL that it provided in the same page.
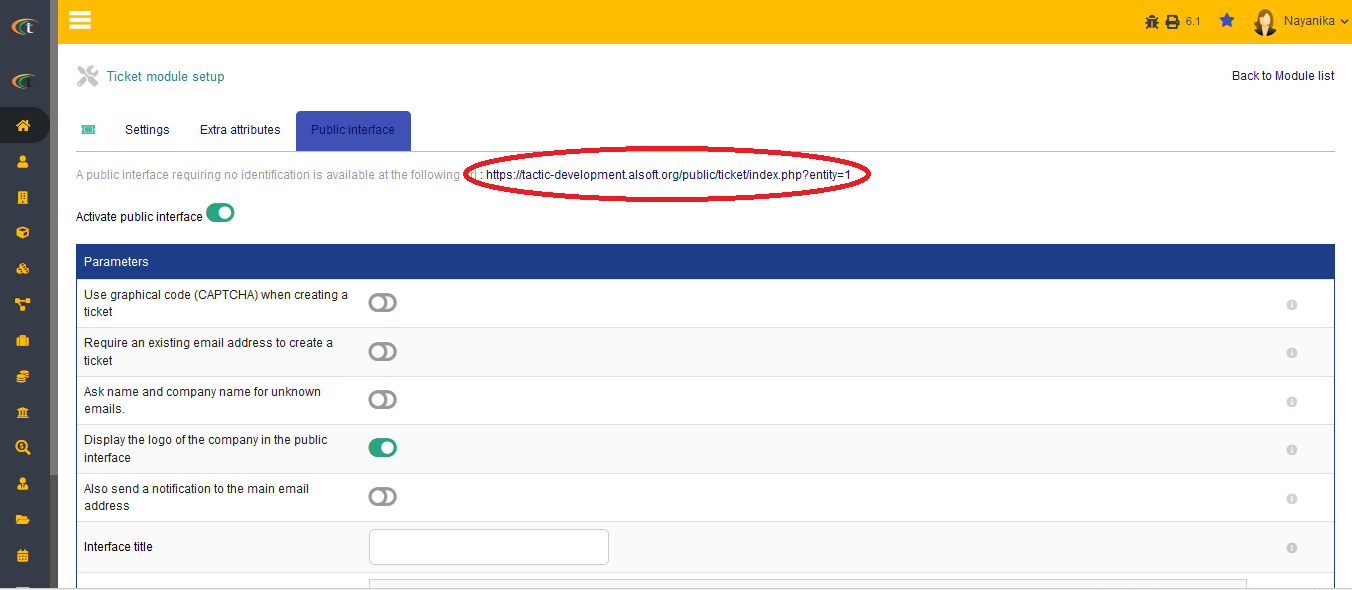
- Step 4: Open the public interface by clicking on the URL.
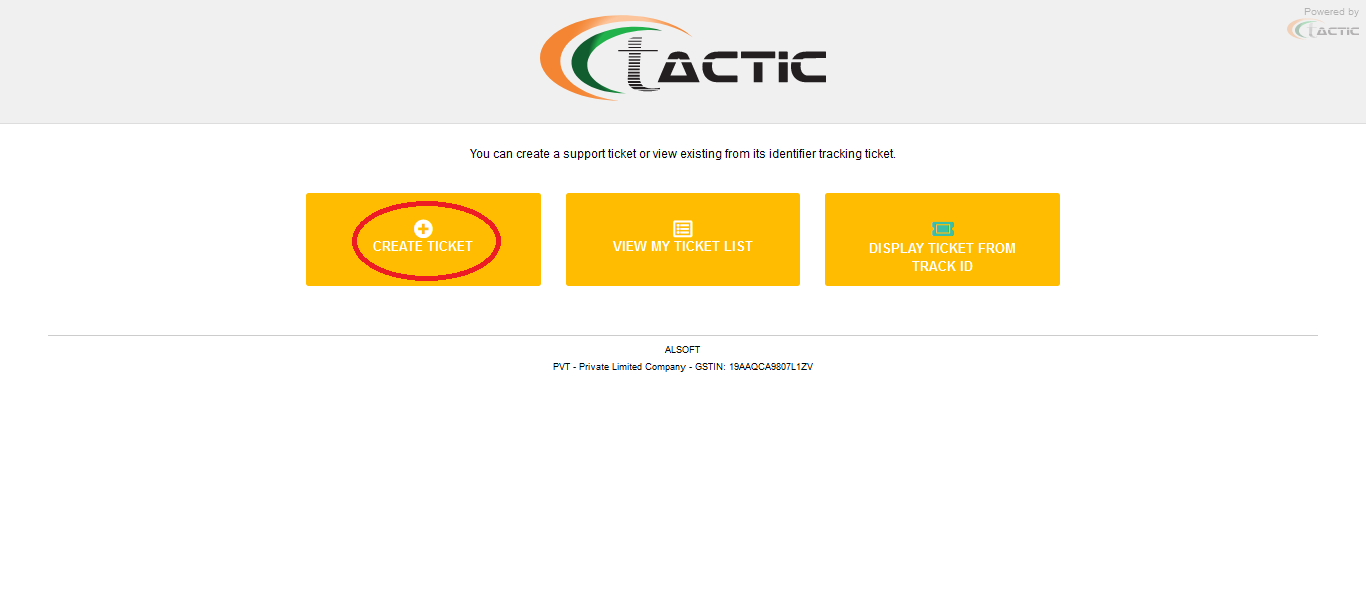
- Step 5: Click on "Create Ticket" option that appears on the new page.
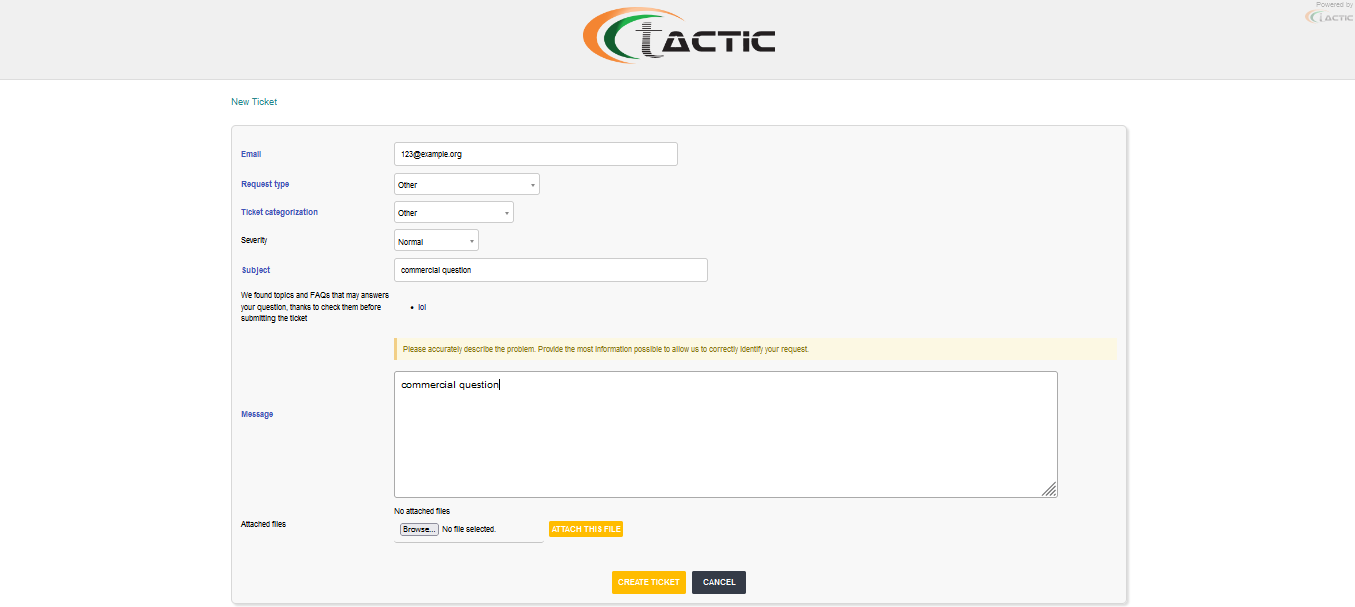
- Step 6: Fill up the criteria and click on "Create ticket".
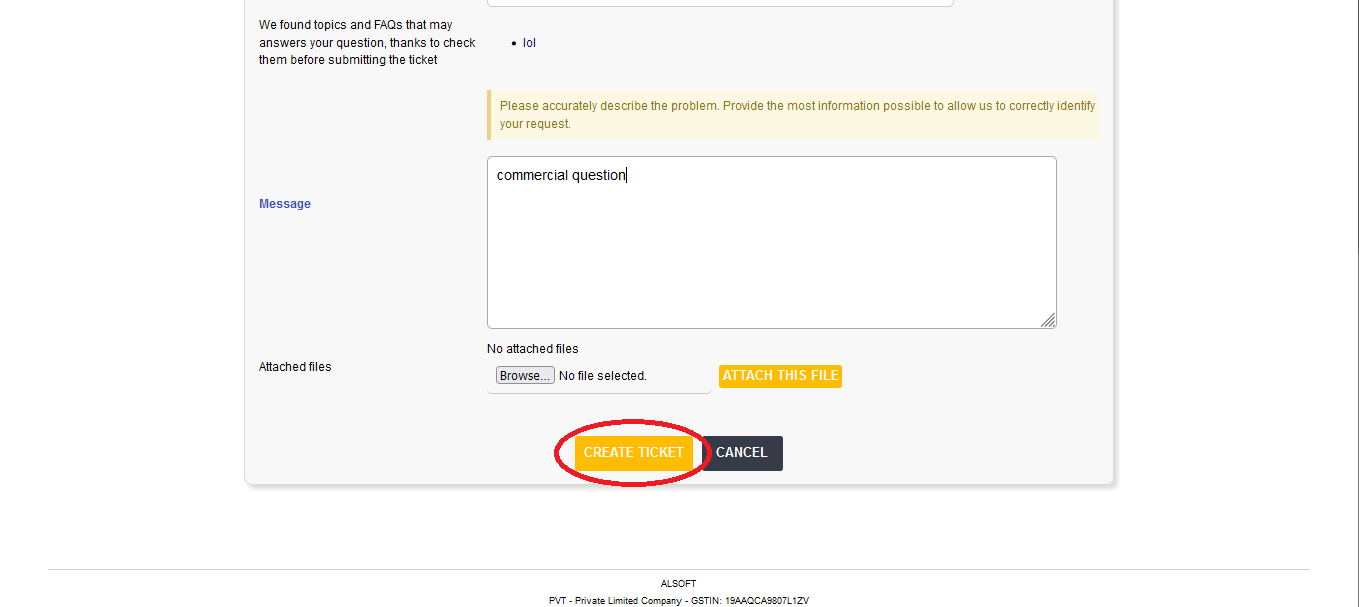

Your ticket will be created from the public interface and a ticket ID will be shared with you, which will be helping you in tracking the progress of your tickets later on.
Notification on a ticket creation
For enabling notification on a ticket creation, you need to go to home -> setup -> modules and applications -> Ticket module under CRM -> click on the cog sign. Once the settings page opens, you will find several tables under different parameters. Scroll down to notification parameter, where you will see an option referring to ‘Notify ticket creation to this e-mail address’, put your preferred email Id on that box and click on save. Once you are done, your changes will be saved.
