Members Module
Introduction
Members are considered as one of the most important factors to be associated with an organisation. There can be several types of members associated with a company, such as employees, stakeholders and more. Management of these members is important for implementing an effective workflow. Tactic’s Members Module helps the organisations in managing their members all at one place. The users can easily create and specify member type and use those while adding new member profile. This makes it easier for the users to keep all member related data organised and easily accessible. This module is used to manage members of an organisation without having to face any complexity. Tactic provides the users with an effective service of managing members with various preferred tools to enhance user experience.
Installation
There is no need of installing this module, as it is already included within Tactic services.
Setup
For using this module the users need to enable it by using an administrator account. The menu options for activating this module are: Home –> Setup – > Module. The users then need to click on Activate. The modules will be activated after completing this step. The settings icon will be visible at the end of the module box, the users can click in that to access further setup for this module to access the functionalities in a better way.
Functionalities of Member Module
Creation of Member types
The users need to create member types before adding a member. An organization can have several types of members such as employees, stakeholders, investors and more. Hence, Tactic makes it easier for the users to specify what the position of the concerned member is.
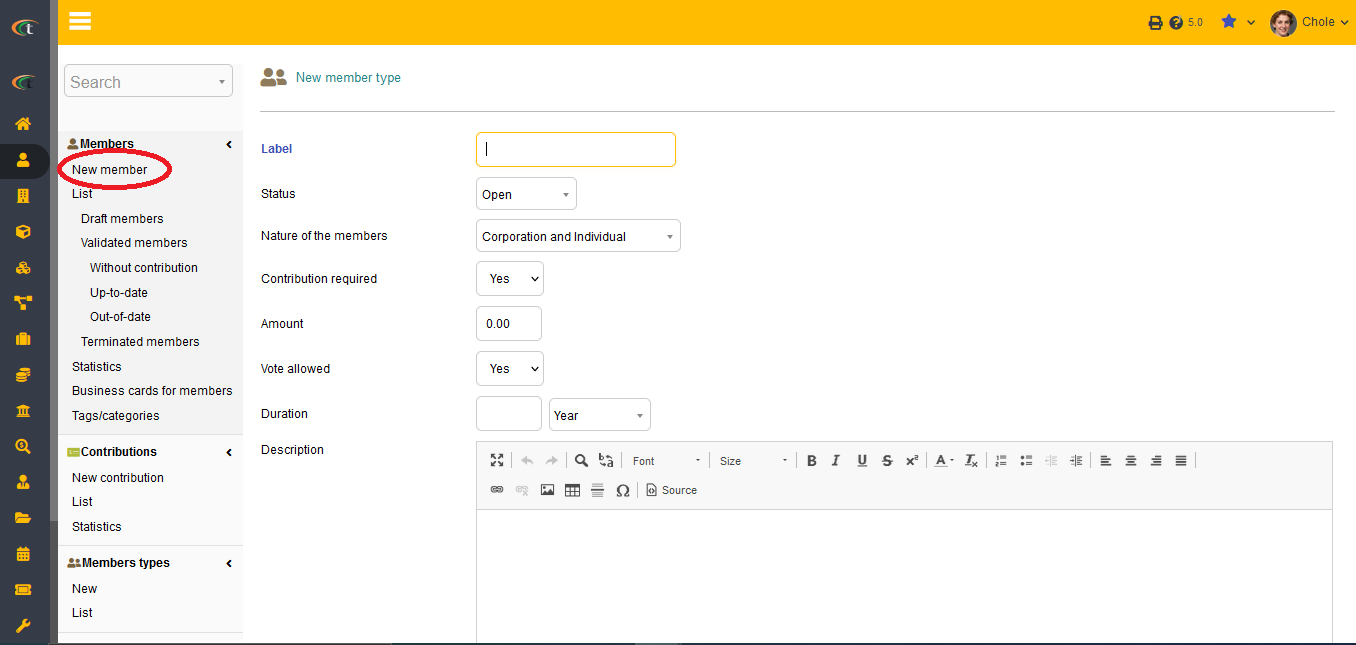
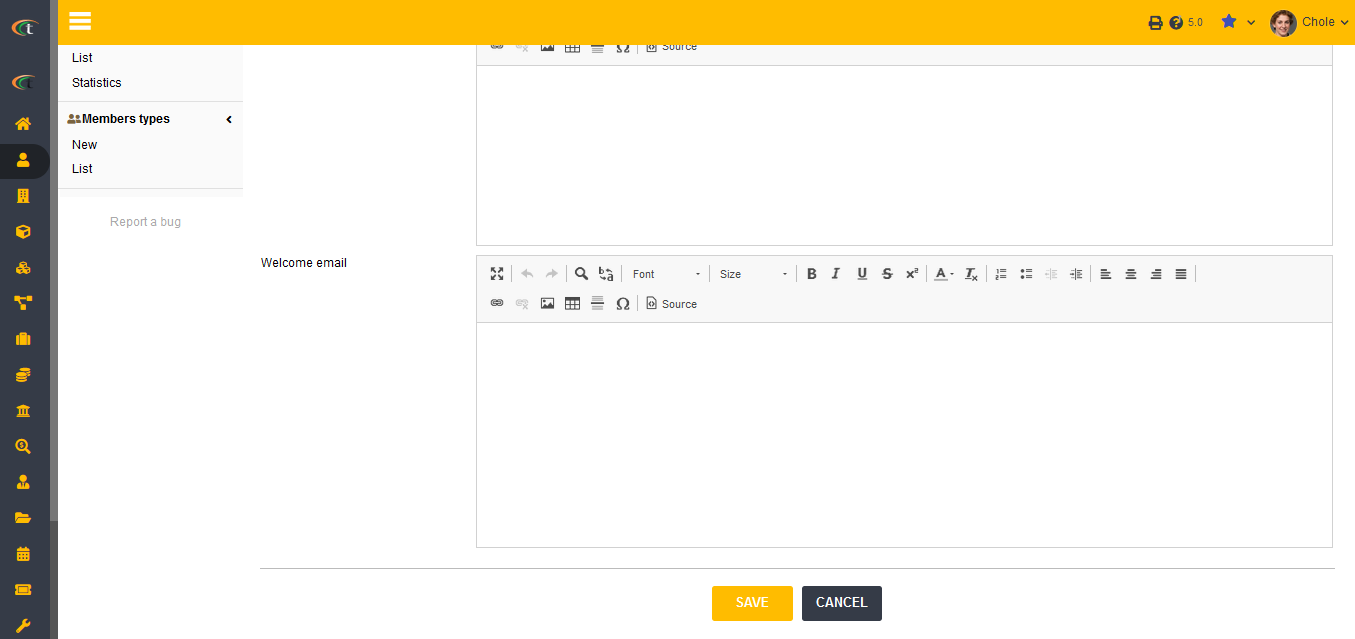
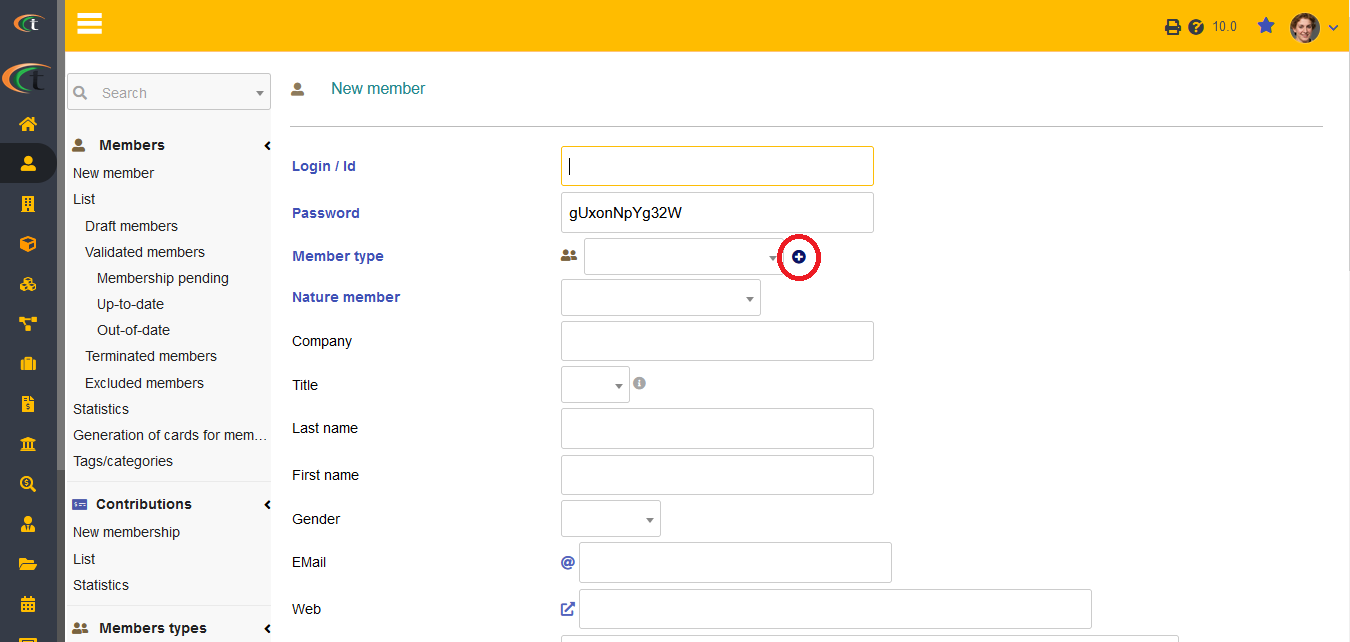
You can now create member types while creating new members. All you need to do is to follow the steps of new member creation, which are home -> members -> new. Now, you will see a small plus icon beside the box designated for member types. You need to click on the plus icon, which will redirect you to the member type creation page. You need to fill all the criteria and hit save when you are done.
The new member type will be saved.
Creating a member
Creating a new member can be concluded within a few steps, which are:
- Going to the member form the main menu bar
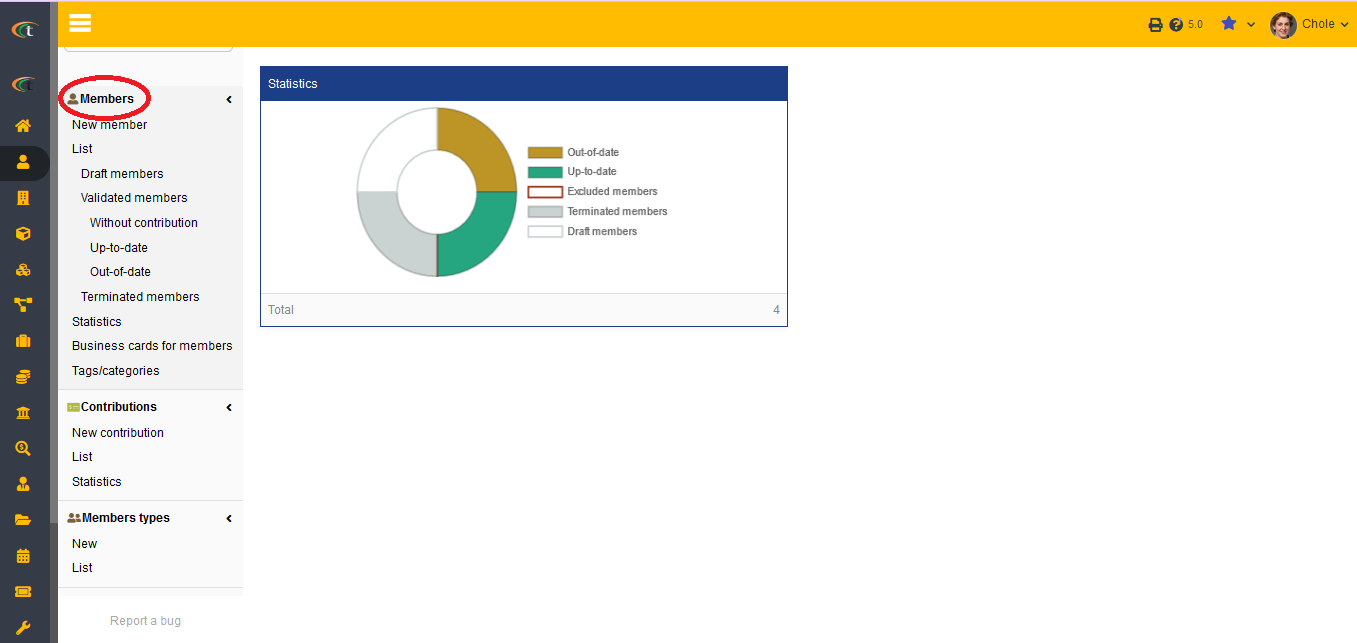
- Selecting the option of New Member
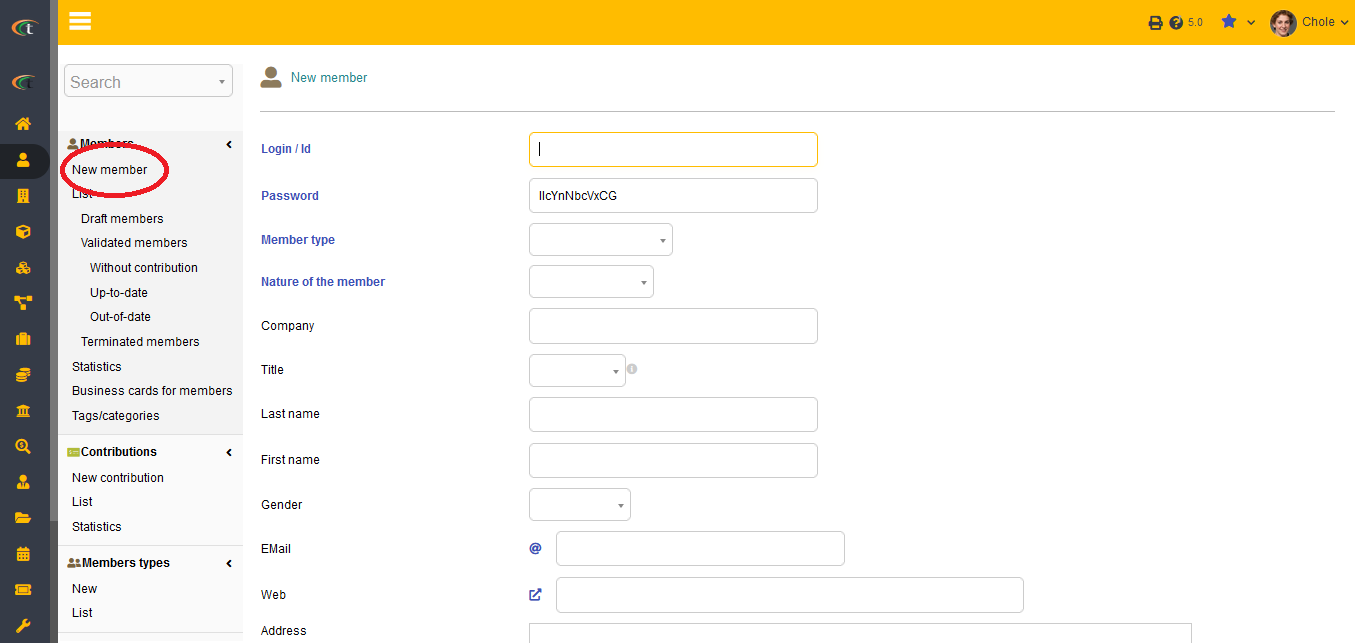
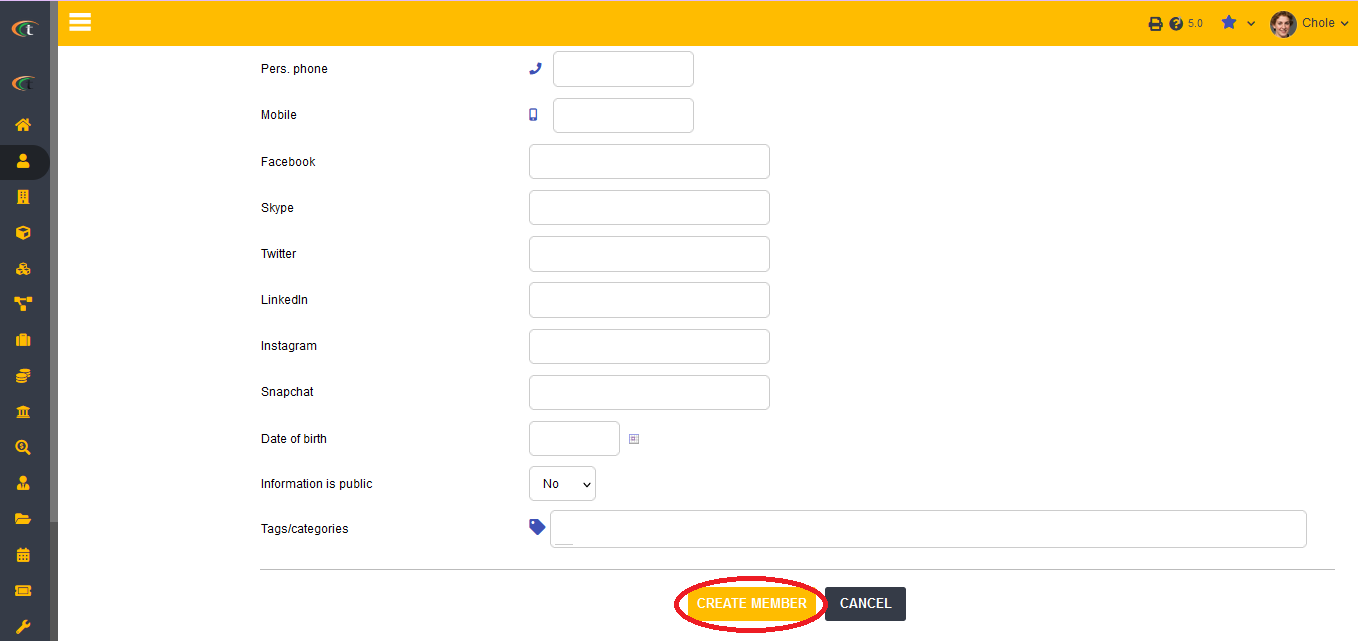
- Specifying the member type along with filling all the criteria with important information and press the option create member
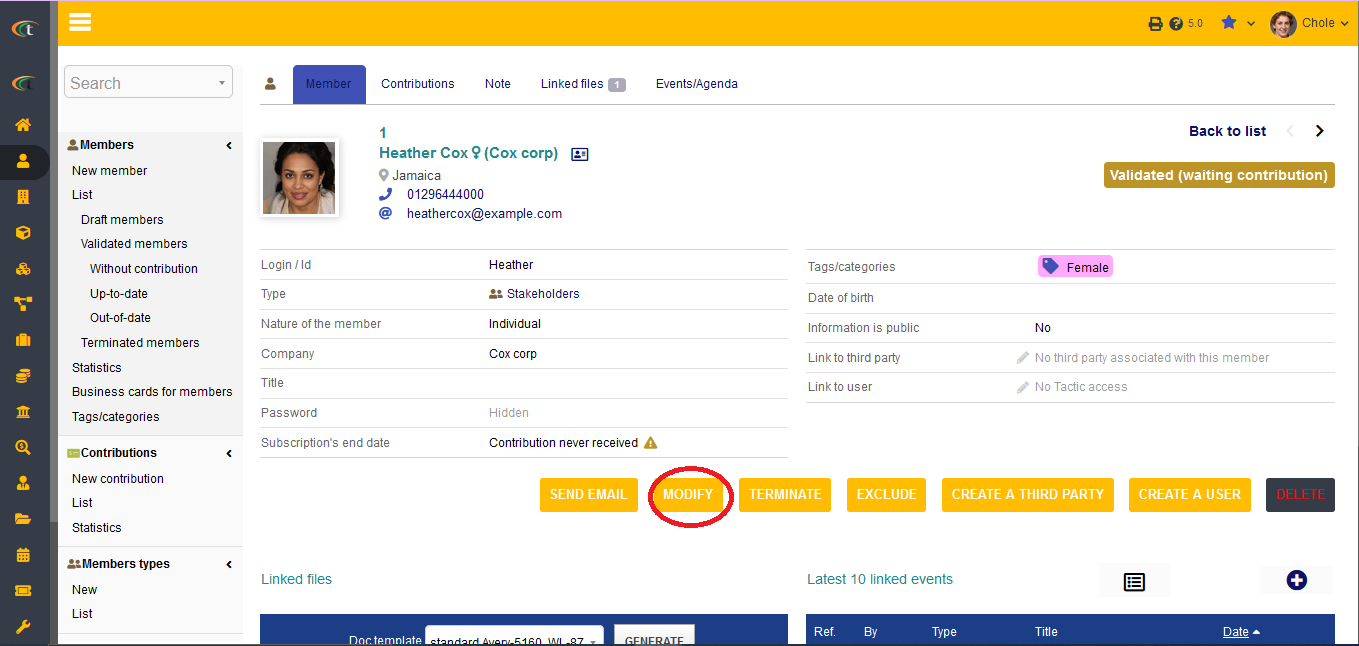
- For modifying the information related to the members, Modify option needs to be selected
Creating or renewing subscription
The users can easily add new member subscription or renew an existing subscriptions without investing much effort. For entering a new subscription the users need to select New Subscription menu. All the important information need to be filled along with the member name and member type, as without these two data, it will be impossible to add new subscription.
Creating business cards
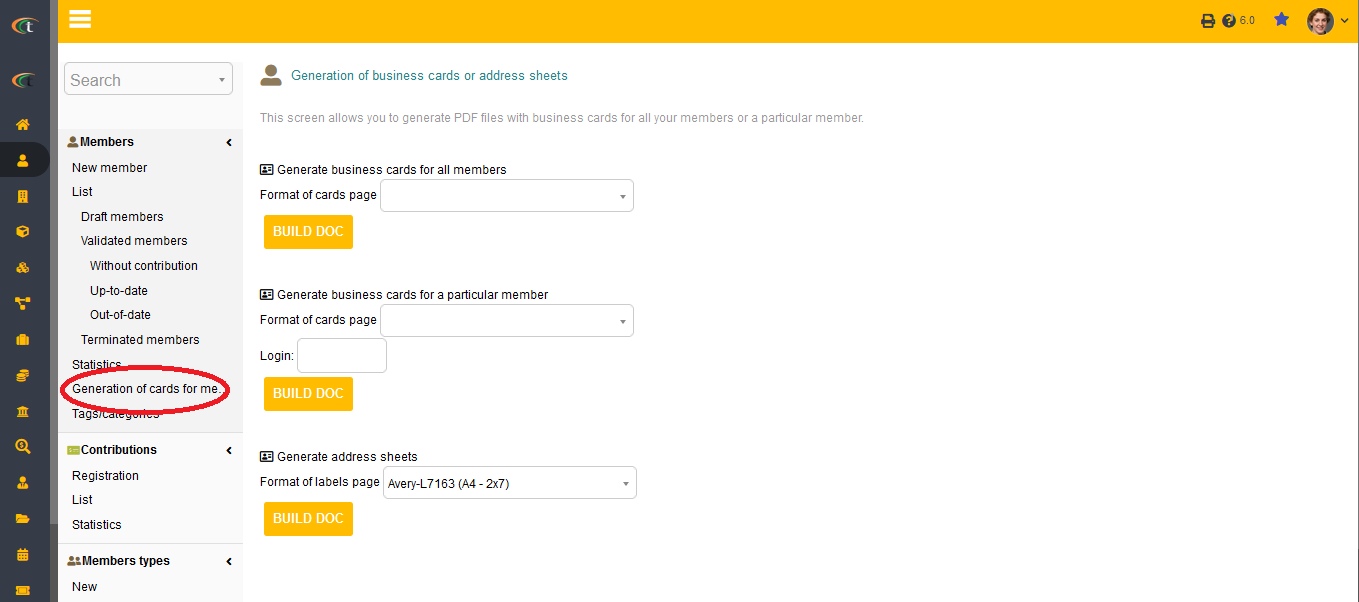
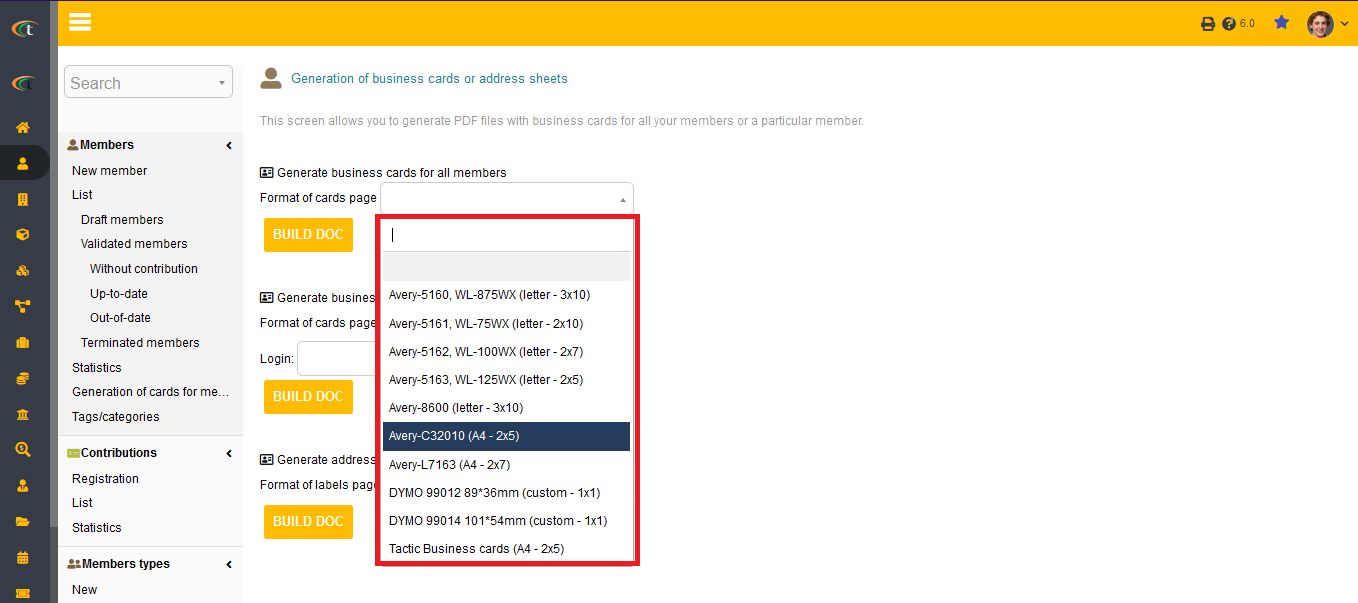
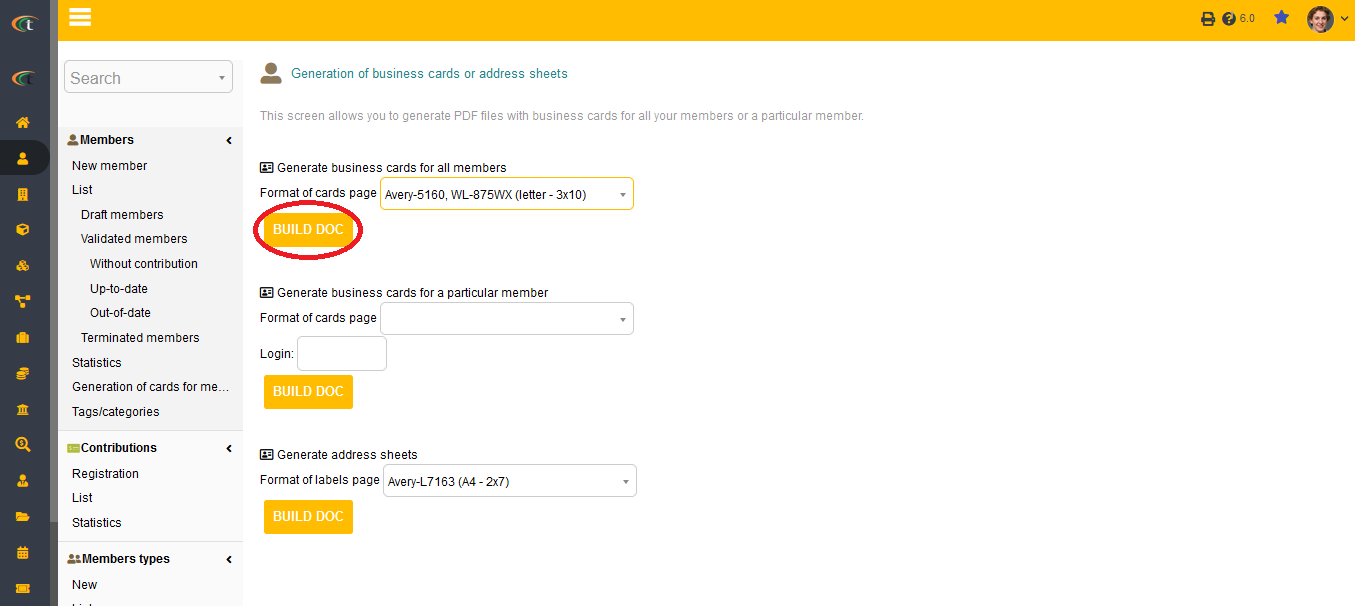
Generating business cards for the members are easy with Tactic. All that you have to do is to follow the mentioned steps,
Member menu (from main menu) -> Generation of cards for members -> Choose the suitable option among the three available options -> Build doc -> The business card will be downloaded
Adding different files
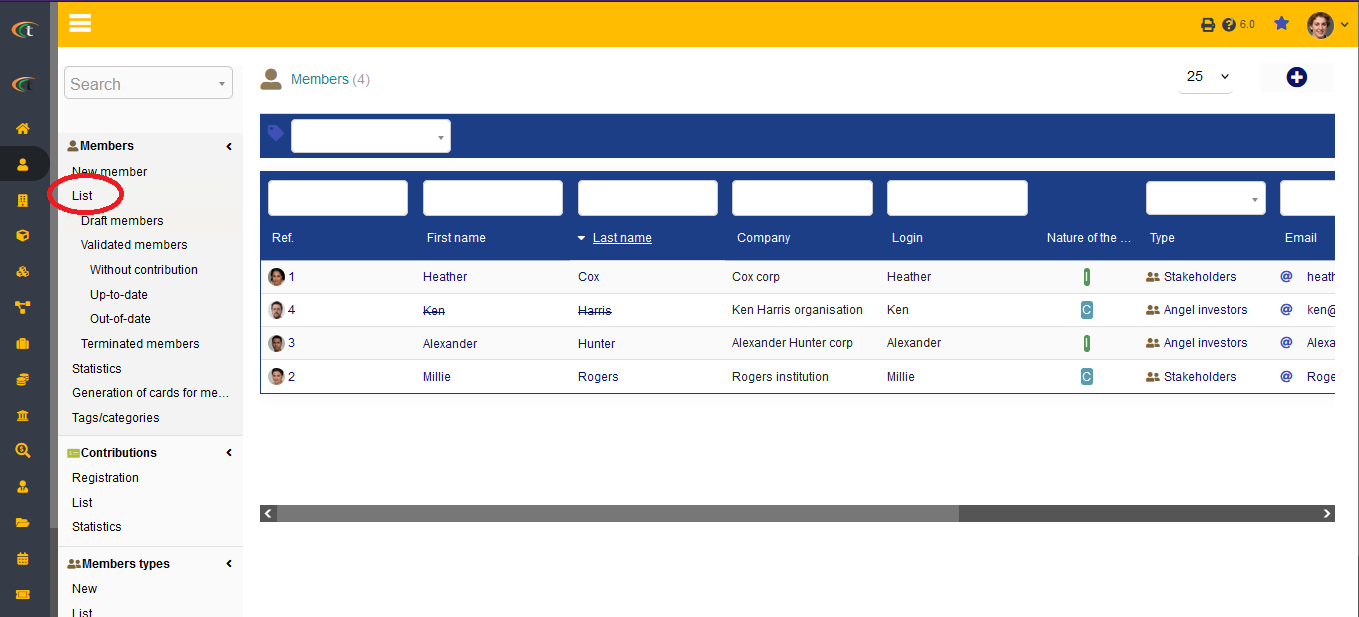
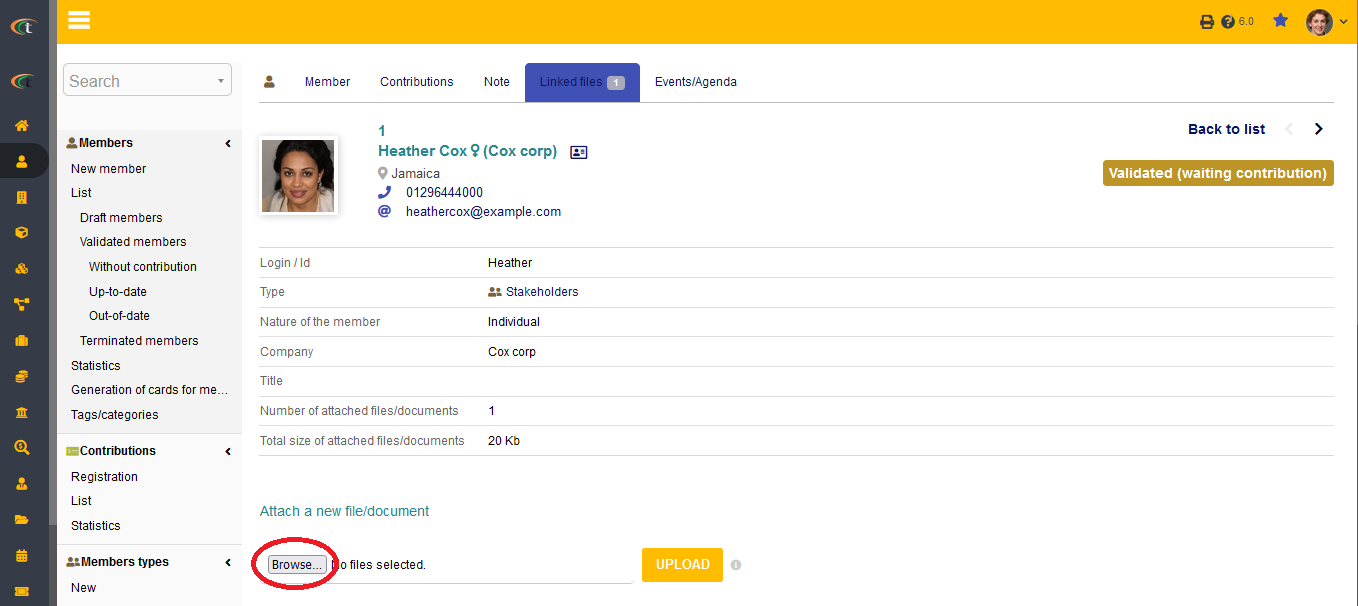
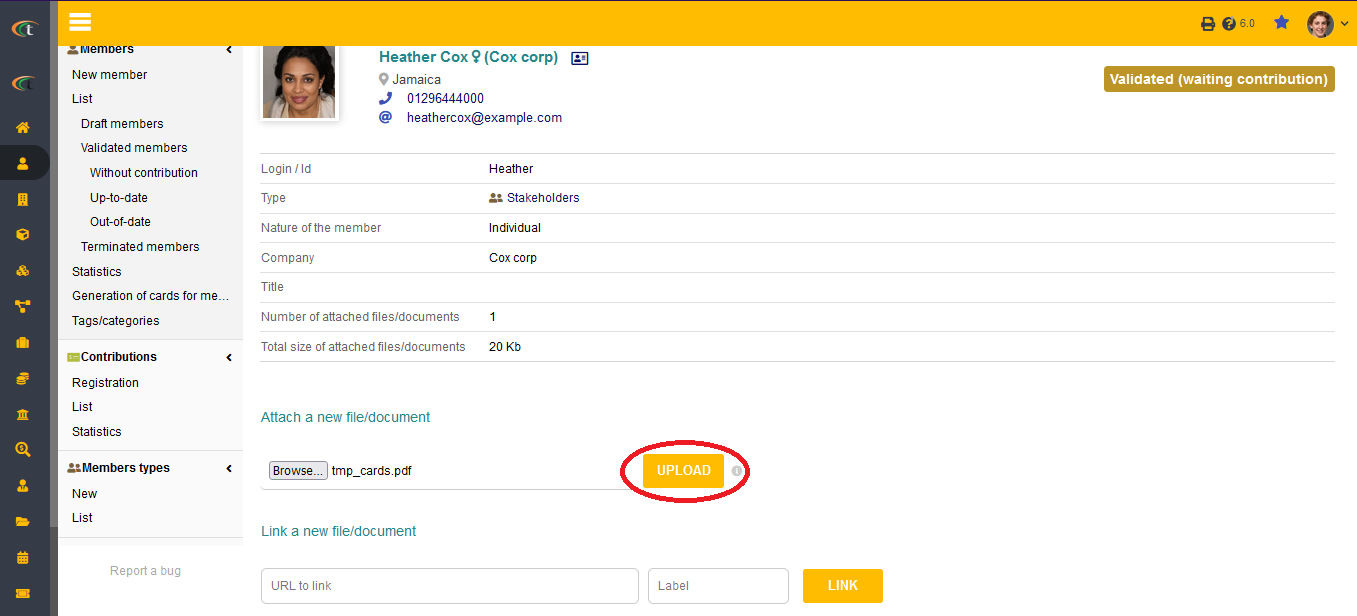
For adding files to the member cards, you just need to follow the steps, Member menu (from main menu) -> List -> Choose the concerned member -> Linked files tab -> Attach a new file/document -> browse -> upload -> your files will be linked.
Step 1
Step 2
Step 3
Creating a third-party from a member
If you want to create a company or a third-party from a member, then all you need to do is to open the member card and click on the option of “create a third-party”. When you click on this option, a confirmation box will open in which there will be a criteria of Company Alias. The name of the member will be reflected in this criteria, but you can edit it and add any other alias as per your requirements.